Showing posts with label oven bake clay project. Show all posts

Wednesday, August 03, 2016

flower rings

I love finding ways to create unique jewelry and now that Lucy is older, I love creating cute little accessories for her. To be honest, this fun ring project started out for Lucy but I loved them so much that I made some for myself!

Oven bake clay (or polymer clay) is so much fun because it is so versatile. It is also one of my favorites for making colorful jewelry. 

Begin by selecting a few different colors of polymer clay.

Roll them out, press and sculpt into the shape of flower petals.

Press those petals together.

Continue to create petals and stack them on top of each other.

I created a variety of different flowers in different colors and shapes.

Bake the clay in the oven according to the directions.

While the flowers look great simple, I love using acrylic paint to add details to the polymer clay. 
Last, glue the clay flowers to ring back. I like using E6000 glue.
These rings are so cute, whimsical and perfect for anyone wanting accessories with a little color!


Tuesday, November 10, 2015

handmade clay stamps


Coming from a pottery family, I've witnessed all kinds of interesting ways to work with clay. One of my favorite little tricks is using everyday things to create unique textures. You can take this concept even farther and create once of a kind stamps to use in clay projects.


I like to gather random things from around the house- legos, jewelry, buttons, legos, basically anything that makes an imprint will work.
You can use just about any clay, I used Fimo Soft Polymer Clay. I started by rolling my clay into a small cylinder.

Next, I used my everyday things (my favorite was one of Lucy's hair clips) and pressed them into the clay. I used each side of the cylinder so my stamp would have two sides.

I baked my clay stamps according to the directions on the package.

Then they are ready to use! Stamp them into any kind of clay to create interesting texture and imprints 

Check out a few ways that I use stamps in my clay projects:

Thursday, July 30, 2015

whimsical bud vases

I love collecting little flower buds from the garden and I thought a set of tiny whimsical vases would be a fun way to display those bouquets.
I decided to use Fimo for this project- it is easy to use, affordable and from my experience, (and research) it is waterproof once baked in the oven.
I started by sculpting a simple head.

I added rabbit ears and small details.

I made a hole in the top of the head,  (deep) enough for a small flower.

The last step was to paint them with a light coat of pink acrylic paint.

Such a cute way to display little flower clippings!


Monday, July 20, 2015

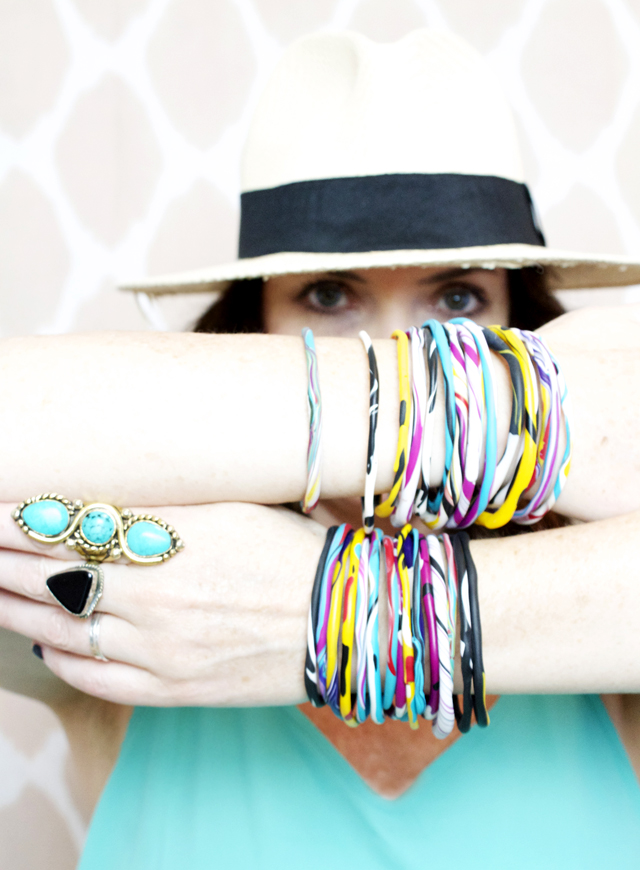
polymer clay bangles


I love bracelets and I have a really big collection that I switch out depending on my mood. I also love finding ways to create my own bracelets and today I am sharing one the easiest ways to create colorful custom bangles!

Polymer clay is my favorite supply to use for this project- it is easy to work with, affordable and come in lots of beautiful colors.

I start by selecting two or three different colors that I roll out, then twist together and then roll again until the colors begin to blend together.


Then I like to add little dots of color and roll again.

The last step is to form the bracelet into a circle. First measure your wrist and then shape the bracelet a little bit larger.

Bake bracelets on a baking sheet according to directions on package.

The result is colorful and unique bangles!

Thursday, April 30, 2015

clay plant stakes

If there is one thing that I love to give and receive it is plants and with Mother's Day right around the corner, I thought I would share one of my favorite ways to add a little bit of whimsy to a plant. Adding a decorative stake to a potted plant is a really fun way to incorporate something fun, especially when giving a gift.

I used oven bake clay because it is super easy, colorful and a fast!
I created round flowers and leaves- I kept the design of the flowers simple because Lucy was helping with this project- she was in charge of rolling out all of the little balls of clay.
I poked a hole in the bottom of each flower and then baked them in the oven according to the directions. After removing them from the oven I mounted the flowers onto stakes.

I love that there are endless ways to put your own spin on this project! I also love that with a few simple supplies, a pretty plant becomes even prettier!

Monday, December 08, 2014

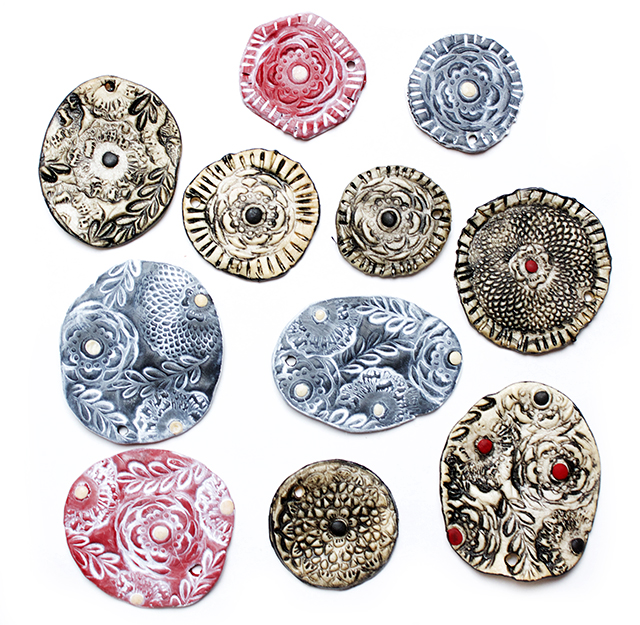
oven bake clay present toppers

Oven bake clay is a great alternative if you want to play around with clay projects! One of my favorite things to make during the holidays is present toppers that can double as little ornaments.
I started with a few different colors of Sculpey oven bake clay - red, black and off-white. I grabbed a few of my favorite flower stamps from my collection. Anything that makes an impression can be used to make an impression or stamp into clay-stamps, leaved, flowers, decorative buttons, decorative jewelry are all things that can be pressed into clay!

I rolled my clay into little free form disks and then pressed my stamp into the surface and carefully pulled it away.

I poked a hole in each of my clay disks.

Next I baked the clay in the oven according to the directions on the packaging (275 degrees for about 15 minutes)

Once the clay cooled I painted the surface. I completely covered the entire surface with black acrylic paint.
While the paint was still wet, I wiped it from the surface with a damp cloth. The paint settles into the nooks and crannies of the designs!
The end result are rustic looking little present toppers that can also be hung on the tree!


LinkWithin

Related Posts with Thumbnails