Tuesday, December 13, 2016

Creating With Jules: Christmas Baubles

Hello! I’m back with a colourful Christmas craft: Geometric Patchwork Baubles. These are easy to make, and with a little help (depending on age) it can be a fun craft to do with kids. 
We love crazy colour in this household, but you could make yours in any colour way or style you like. Just choose the materials that speak to you or that you’re naturally drawn to.

And what a great stash- busting project! I knew there was a reason I hoarded all those pretty scraps that were too good to throw away.

Materials: 
-Fabric Scraps
-Foam Craft Balls
-Wool
-Coloured top pins
-Beads
-Little pom poms
-Tassels

Tools:
-Plastic knife
-Scalpel or similar cutting tool
-Pen
-Sewing needle & thread

Take the foam ball and draw out geometric shapes randomly all over. It doesn’t matter if you end up with some big and some small shapes. 

Cut into and along these lines with your sharp cutting tool. 

Now take a piece of fabric that is larger than one of your shapes and start pushing it into the cuts made with your plastic knife. You can trim the fabric as you go to the right size. If you get it wrong it’s easy enough to pull out and start again. 

Keep going around until your whole shape is covered in pretty fabric pieces.


Now take your chosen wool colour and wrap it and pin it between the pieces of fabric as shown. Push the pins all the way into the foam ball. You may need to cut your wool, or just double it up in some places as shown in the photo. 
Take your needle and thread and stitch two tassels together and then through a mini pom pom. Attach to the bottom of the bauble. 

Take a loop of wool for the top and tie it together and then pin it into the top. For extra strength here I suggest you also sew it to some fabric on the bauble so that it’s not easily pulled off it’s hanging loop by little fingers if there’s kids in your house. We don’t want any pins falling out causing accidents!
Thread a bead onto the top loop as shown.

You are now ready to hang your bauble. We made a few of them and we still have some in progress here. I think they're going to make great colourful additions to our Christmas tree this year!

To see more of my work or to get in touch, visit me at http://julesmadden.blogspot.com.au

Monday, December 12, 2016

NEW! petals & paint retreat open for registration


Friends, I am SO excited to announce that I am offering a retreat in my studio this year! Due to a crazy schedule, I had to take a break from teaching live classes and while I have another busy year coming up, I was able to find a time slot for a 3 day retreat. Right now it looks like this might be the only retreat I will be able to offer this year (but I will keep you posted when or if this changes) so if you are interested in creating with me, in my studio, now is your chance!


PETALS AND PAINT: A Floral Art Retreat
March 17-19, 2017
$650.00  EARLY BIRD SPECIAL $550.00 Until January 15th

Join me in my studio on the Oregon Coast for three days of color and creativity! We will be immersing ourselves in my favorite subject matter- flowers. Throughout the three days, I will be demonstrating all kinds of my favorite techniques, tips, tricks and materials for creating beautiful and expressive floral paintings. From watercolors to acrylic paint, exploring color, layers, materials and working big and small, we will dive into all things floral. Whether you are a beginner or an intermediate artist, you will come away with tons of inspiration and new ideas for creating floral art.


REGISTRATION

$650.00 Early bird special $550.00 until January 15, 2017.
Includes supplies, lunch and snacks all three days
Please note- we have limited space available for this retreat, if all spots are filled we will open up a waiting list.
Single day classes are not available.

If you have any questions about registration or payment you are welcome to send an email to alisaburke@gmail.com

For more information, details or to register, visit my shop HERE

MY TEACHING STYLE

I've been teaching art since 2004 and while I have a formal education in fine art, I love to break the rules! As a teacher, it's my mission to share simple techniques that artists at any level can use to create bold and colorful art. I also like to cram as much creativity as I possibly can into my classes! My goal is to inspire my students and provide new ideas, techniques, live demonstrations, one on one support and the space to make creative discoveries. One of my favorite parts of teaching live, is the having the time to connect with my students, get to know other creatives and answer questions about art, life and business.


ABOUT MY RETREATS

Retreats are held in my art studio in Seaside, Oregon.

We do not provide lodging or transportation services.

Seaside is a small town and regardless of where you are staying, everything (from the beach to downtown to the grocery store to my studio) is within minutes (driving) of each other.

The Oregon Coast has very unpredictable weather that can change at a moments notice. Some of our activities could change or may depend on the weather but be assured rain or shine- we will be having lots of fun together!

If you need recommendations or have any questions about class content, travel, lodging or the area feel free to email me at alisaburke@gmail.com.

There is no supply list for my classes. To keep things simple and easy for you- I provide all supplies. If you have favorite supplies (pens, brushes, watercolors or paper) feel free to bring them but they are not required.

Cost of class includes supplies, lunch and snacks all three days. Cost does not include dinner or any optional activities. 

THE OREGON COAST
It is so exciting to have a creative space to open up for my classes and retreats! My studio is located in my fabulous hometown of Seaside, Oregon – a lush coastal community with miles of beautiful pristine beaches and vivid ocean views. Seaside is a small coastal resort town surrounded by nature’s wonders: Elk wander freely in our yards; seals mingle with the surfers; gray whales and dolphins graze offshore; tide-pooling at dusk; beach combing after a winter storm unearths treasures washed up from far-off lands half a world away. It’s a combination of the historical past (near Lewis & Clark’s final destination) and quaint modern coastal community. The vintage 1920’s promenade boardwalk skirts the Pacific Ocean for a mile and a half and in the summertime the town is buzzing with activity. This is my hometown and the magnet that has been pulling me back North for so long. It’s been my greatest dream to offer classes and retreats in Seaside, Oregon and to share the wonders of the Oregon Coast with you. 

Thursday, December 08, 2016

shop update!


Hey Friends! I've got some new goodies in the shop! A batch of pottery (on sale) and a batch of messy pouches.


Tuesday, December 06, 2016

shading a coloring page: tips and tricks

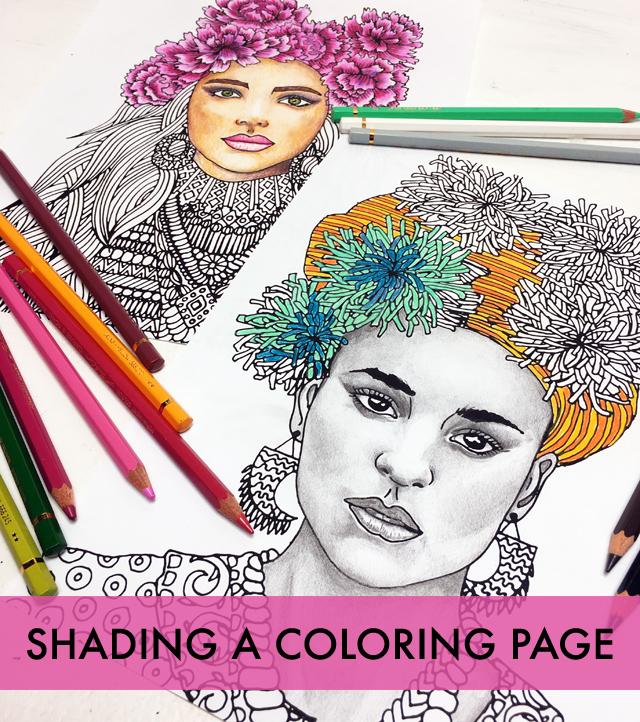
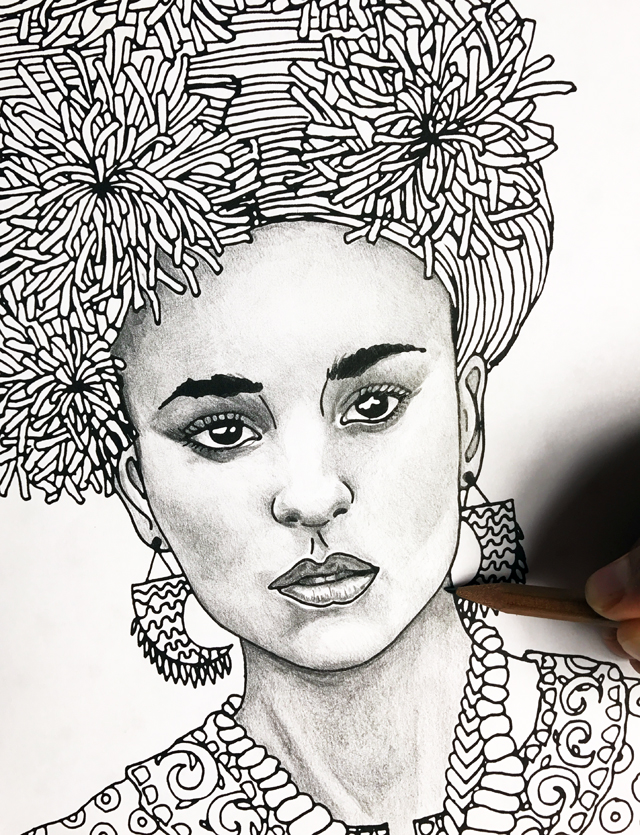
Last week I launched my new coloring book- Feminine Wild. This is a 25 page self published coloring book that I collaborated on with my crazy talented husband Andy. About 6 months ago, we had the idea to create a coloring book that made use of our individual talents! Andy is a master at drawing portraits and I love drawing pattern so we began working on a coloring book completely dedicated to women- all kinds of bold and beautiful women.

This coloring book lends itself to coloring pattern but we also wanted to do something a little different and create pages that give you the opportunity to play with shading faces. Today I asked Andy to share some simple tips and trick for shading faces with pencils.

There is no rule that says you always have to use color on a coloring page. In fact, using a lead pencil is a really great way to practice shading.

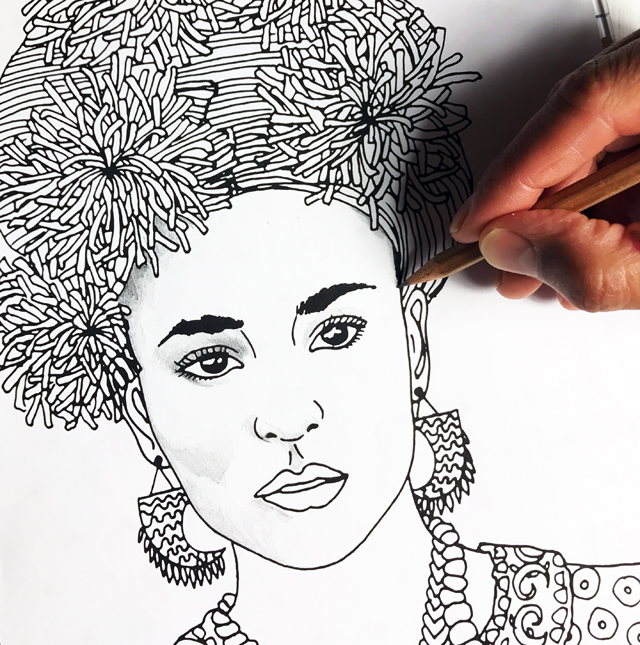
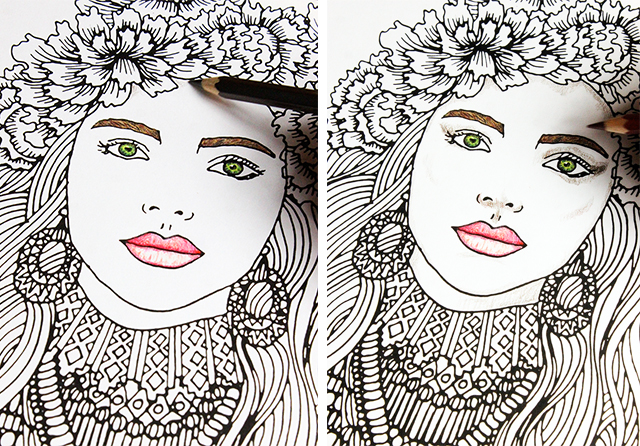
Shading a face is all about bringing depth and dimension to a flat line drawing. I like to begin by adding light areas of shading to the places on the face that typically have contour or shadows- the top of the forehead, cheek bones, above and under the eyes and under the nose.

This process starts very light which means I put very little pressure on my pencil as I shade.

To gradient shade, I move my pencil back and forth on the paper going from dark to light by applying pressure for the dark areas and light pressure for the lighter areas. My goal is to create a shade that flows smoothly together from dark to light. 

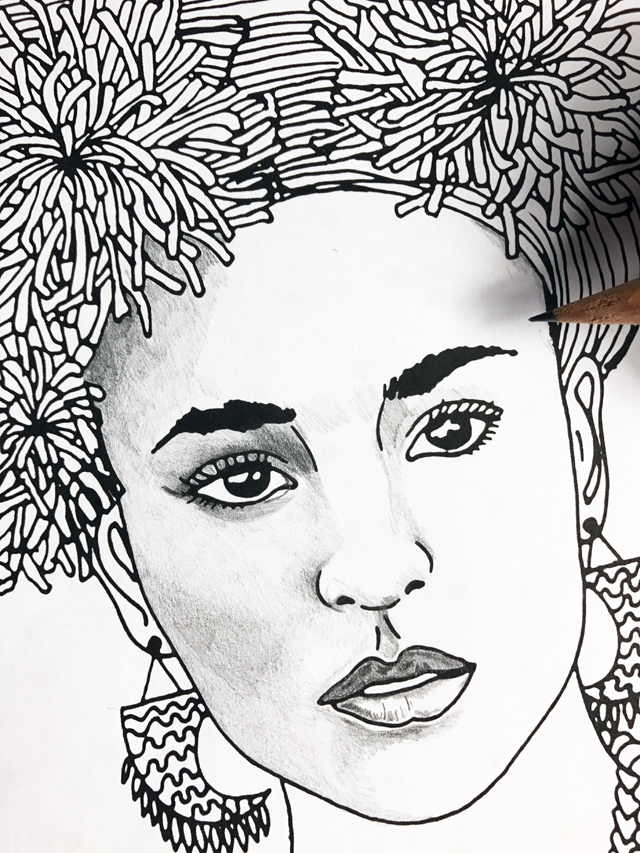
After I have those light areas, I begin to go back over them with gradient shading. Gradient shading is probably one of the most common ways to shade an object. It is the easiest way to transform a 2-D object into something that has dimension and life.

TIP: If you are using a pencil for gradient shading, different grades of pencils will create different results. For example pencils with a "B" gradient are softer (B-9B) and will create a bold, dark lines. Pencils with "H" gradients are harder (H-9H) and will create light, softer lines.
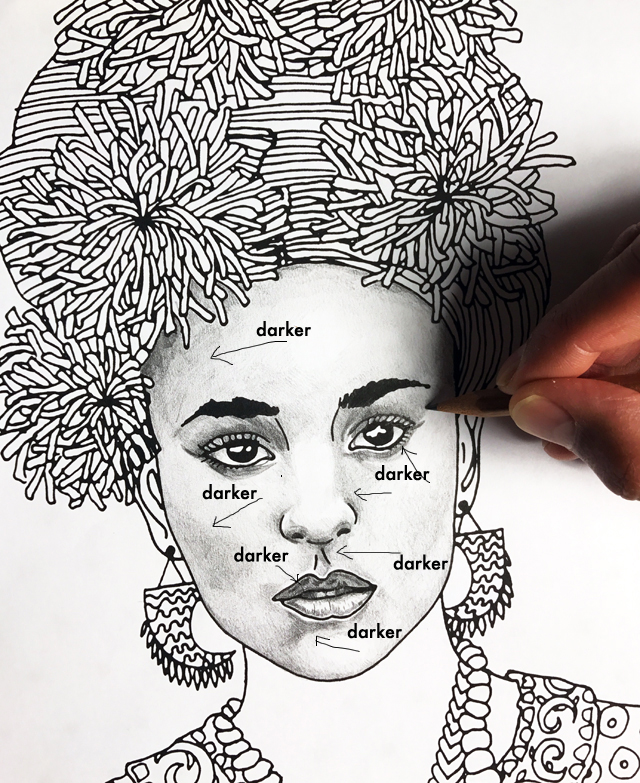
I continue to layer the shading and get even darker around the forehead, the eyes, cheek bones, under the nose and chin. An easy guide to use for darker shading is to go darker next to the lines on.

TIP: Leaving a sliver of white under or around the lips and eyes give the illusion of dimension.


I continue to layers my shading to my shading until light and dark begin to blend together.

TIPS: Holding your pencil at different angles will result in different results (lighter vs. darker, smooth vs. texture, etc).

Keep the tones of your shading the same by applying the same pressure on your drawing tool.

If you are using a pencil to gradient shade, try blending or smudging the lead on paper with your finger or a blending tool (blending stump).

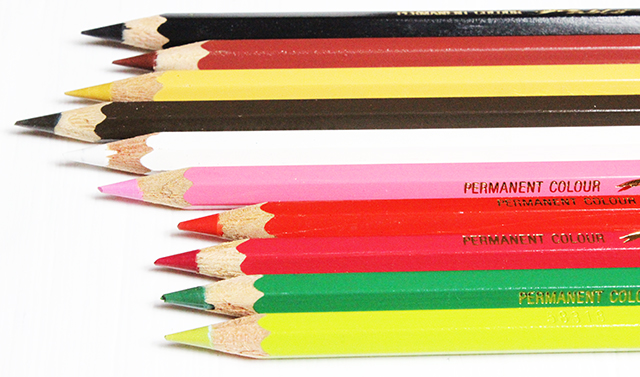
Using colored pencils to shade a face is the same concept as using a lead pencil except you have the ability to layer color. I like to start by selecting my color palette.

TIP: When selecting colors, make sure to grab different shades of a color- this will enable you to achieve the illusion of depth and dimension.

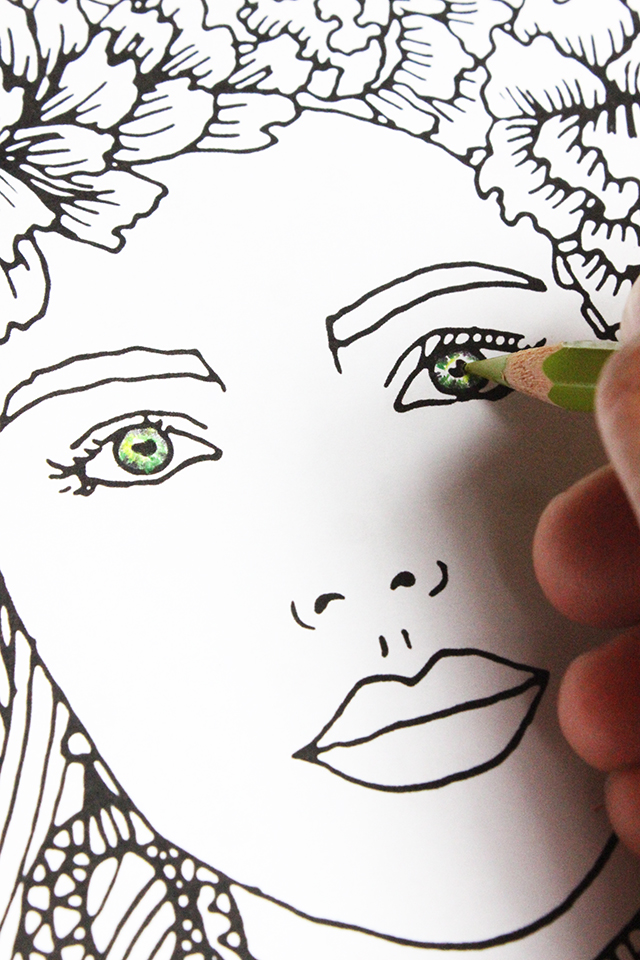
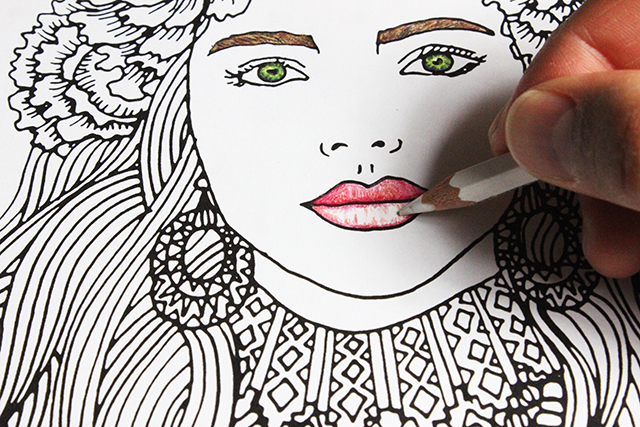
Next, I begin with the eyes. I start by selecting the darker shade of color (in this case green) and then go back over it with a lighter shade of green and then back over it again with white. This give the illusion of depth.

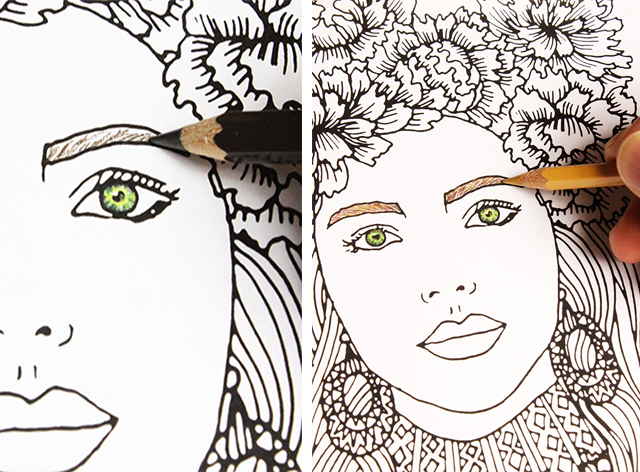
Then I move on to eyes brows- again I start with the darker color and then add lighter color over the top.

For the lips I start with a dark color and then add white highlights over the top.

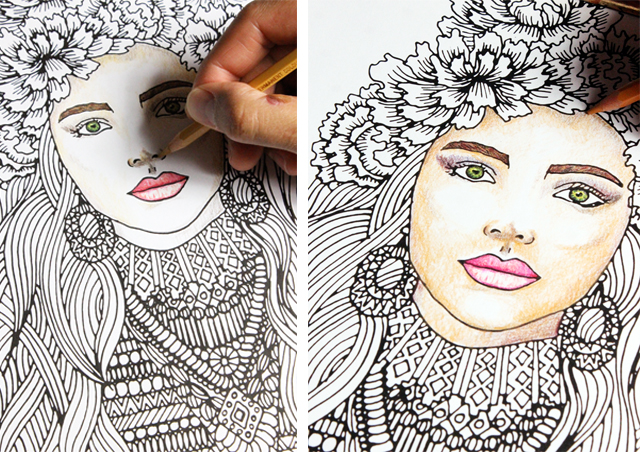
When it comes to shading the face, I use the same technique that I used with my lead pencil. I start with the darkest color (in this case dark brown) and lightly shade the areas that have more contour or shadow.

Next I begin to gradient shade with a lighter color over the the entire face- using more pressure around the areas where I want it darker.

I switch back and forth between my different shades, adding areas of darker color over the top of light areas and lighter color over the top of darker areas.

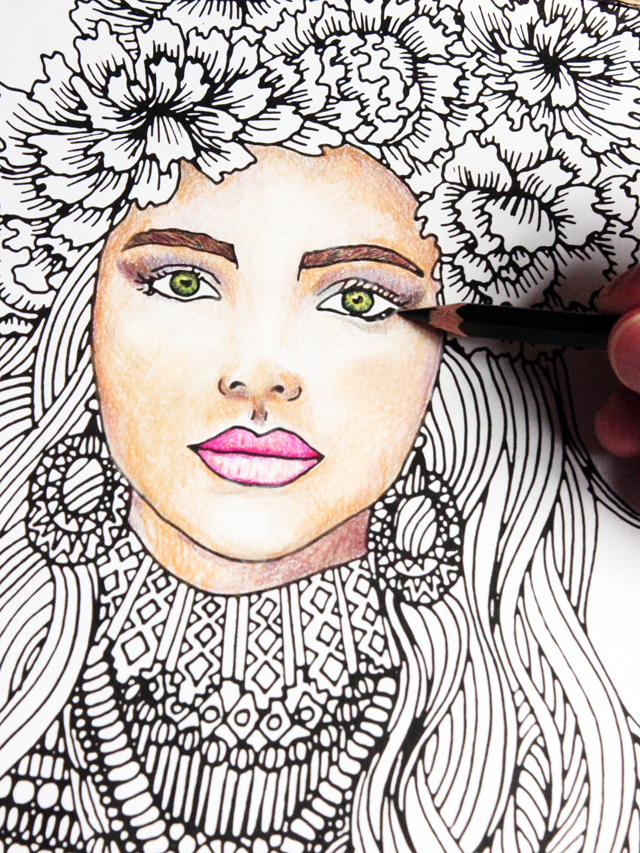
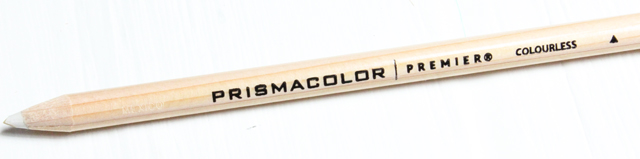
Last, I like to use a blending pencil to go over the top of everything. The blending pencil enables you to soften hard edges and blend different shades of color together. 


Monday, December 05, 2016

5 fast ways to paint a glass ornament

One my favorite things to make and give or to use in my own holiday decorating is painted glass ornaments. I have been painting glass ornaments for years- I even spent a good amount of time selling custom ornaments. And what I learned is all kinds of fast techniques that can be used to customize glass ornaments. So today I am sharing 5 fast ways to paint a glass ornament.

There are all kinds of glass and even plastic ornaments that come in a variety of shapes and sizes.
I always start with a base coat of white acrylic paint. This white base makes the layers of color that come next more vibrant.

Using text it a fun way to personalize an ornament. Use inspiring words, quotes, song lyrics or even names! 


Colorful flowers are my favorite subject matter and look great of the surface of an ornament!

3-D paint is one of my favorite ways to add embellishments to an ornament.
Messy layers of paint are a great way to create a colorful and unique holiday ornament!

Repeating simple shapes is a fast and easy way to create pattern on the surface.


Thursday, December 01, 2016

in the studio with alexis drolet


Hi! My name is Alexis, the artist behind the Etsy shop “Dashes of Happiness,” where I make and sell colorful abstract art with motivational and inspiring hand lettering.  I’m a 35 years old, living in the suburbs outside of Philadelphia, PA with my amazing husband and two daughters, ages 8 and 10. I’m actually not one of those people who always dreamed of being an artist. In fact, this is something that I never saw coming. I took my first art class at age 30, after spending basically my entire life telling people, “I don’t know how to draw,” without ever once attempting to learn how to draw. One day it just sort of clicked that all of the skills that I silently wished I possessed, were things that I had never even given myself a chance to learn. So I swallowed my pride, and found a local beginner’s art class. Once I got over the initial anxiety of doing something so outside of my comfort zone, I absolutely fell in love with it.  I think I always had all of this art inside of me, I just never knew how to get it out. And I’ve found that the more that I learn and the more that I create, the more inspired I feel. It really is like stoking to a fire.  

I love seeing how other artists set up their creative space. Can you tell us a little bit your studio?

My studio is the spare bedroom at the top of the last set of stairs in our funky split level home. From the first moment that we saw this house, I just knew this would be my creative space someday. I think the exact words that I said to my husband were, “The natural light in here is way too good to waste on a guest room.”  

I share the room with my daughters, and we have always called this room, “The Art Room.”  Several years ago I painted one wall with magnetic chalkboard paint and bought them a bunch of chalk and magnets to continue to encourage them to use this space to create and display their art. Over the past few years I have claimed a little more of the space as my own, and I sometimes I have to erase all of their cute little chalk drawings to use the wall as a photo backdrop for one of my projects, but I still try to let them use this room to make their art as much as I use it to make mine. 


They have a desk along one wall, I have a desk along the other, and we fight over the floor space in the middle. Usually the room is a creative disaster of projects in various stages of completion, with pages of paint drying on every available surface. And since I share it with my girls, there is pretty much always glitter on the floor. But regardless of whether it’s clean or messy, when the afternoon light streams in through the windows, it is pure magic.  
What inspires you? What motivates you to create?

Without a doubt my two daughters are my inspiration, my motivation, and my everything. 

In a broad sense, my work is inspired by them because it’s very colorful and joyful, and almost all of it is stuff that they want to hang in their rooms. Lots of my artwork features positive messaging, and as my girls rapidly approach their teen years, I think more and more about the importance of promoting positive self-worth and self-esteem.  When I’m creating, I always think about what I want them to see every day when they wake up. 

In a literal sense, my world of inspiration is very much a product of our daily life. In the past 10 years as a mom, most of my time has been spent with them- at parks, playgrounds, museums, and the sidelines of sports fields. We are constantly out exploring together, and the colorful images of our daily life sink into the corners of my brain and then eventually spill out through my paintbrush.  I sometimes don’t even know exactly where my inspiration is coming from until I find an old photo, and realize that my latest painting has all of the same colors and movement as something that I photographed on a whim months ago. 

How do you organize your creative schedule?

As an artist I have learned that without deadlines, I pursue perfection to the point of producing nothing.  So, I have been forcing myself to commit to things that I am not necessarily ready to do, in order to get a deadline in front of me. For example, the only way I could actually get myself to hit publish on my website was to enter an art contest that required me to have a website. In the end, it was the contest submission deadline that finally forced me to finish the website. Then I registered to sell at an art show even though I had no inventory to sell and frankly had no idea how to set up a booth once I had my inventory. At that show, I put a notebook out on my table saying “Join my email list,” even though I had absolutely no sort of email system in place.  Once I commit to something, and I know I have to make it happen, I always pull through. I guess it’s called “Fake it until you make it.” 

What is a typical day like for you?

I’ve been selling my art for less than a year, so I honestly feel like a baby that is still trying to learn to walk. For the longest time I just kept adding things to my plate without taking anything off…and that didn’t go very well. So I’m still learning how to actively pursue my art and make it my priority, instead of just trying to fit it into the nooks and crannies of my day.  I find that I have to continually fight back at the self-imposed notion that I have to be everything for everyone all of the time.  

On an ideal day I’m up early before the kids, sometimes early enough to get a little bit of computer work done over a cup of coffee. Once everyone is awake and I’ve successfully completed the lunch making, hair brushing, shoe finding shuffle to get them off to school on time, I try to spend a few hours painting.  My energy and creativity are at their peak in the morning, so I try not to waste that time on household tasks. I tend to chase the natural light around my house, and if I have any projects to be photographed, I’ll drop everything for an hour or so in the early afternoon when the light is warm and perfect in my studio.  
Once 3 pm hits, it’s a flurry of homework, violin practice, dinner making, and getting everyone out the door for sports practice. I rarely work after dinner so that my hubby and I can relax together on the sofa, and then I turn into a pumpkin around 10 pm. I feel like each day is simultaneously a marathon and a sprint. 

What are you working on right now?
Oh, so many things! I’m still learning so much every day, both on the creative end, and on the business end.  It feels like there is a never ending list of skills I would like to learn and things that I should do to help my business grow.  On days when I just want to create, I’ve been painting lots and lots of greeting cards. They truly are my favorite things to make. Each card is like one of my babies, and I have the hardest time letting them go.  But I know that they spread joy to everyone who sends them and receives them, so that motivates me to just keep making more.  
I’m also working with my friend on a handmade jewelry and accessory brand, where we are combining our talents to make wearable art that is super unique as well as empowering.  The best part about being an artist is that it really feels to me like the sky is the limit, and now that I have the skills to get these ideas out of my head, it’s just a matter of finding the time to do it. 

Want to see more of Alexis?

Also you can find updates at www.alexisannecreative.com
Or on FB and Instagram @AlexisAnneCreative

"In the Studio" is a feature here on the blog where I share a glimpse into friends and fellow artist's and crafter's spaces. If you are interested in submitting your studio to be featured, send me an email at alisaburkesubmissions@gmail.com


LinkWithin

Related Posts with Thumbnails