Showing posts with label frequently asked questions. Show all posts

Friday, July 27, 2018

how I quit my job to work as an artist


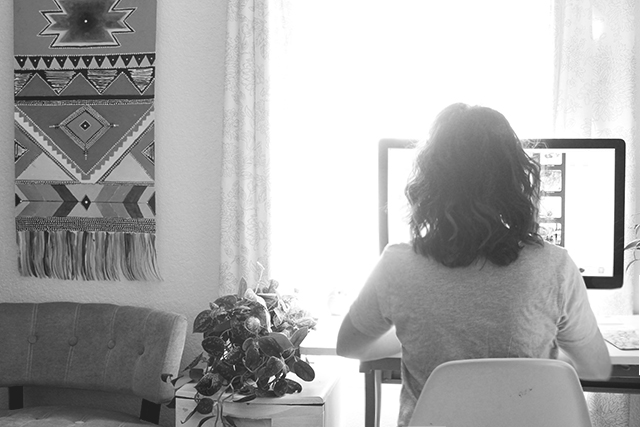
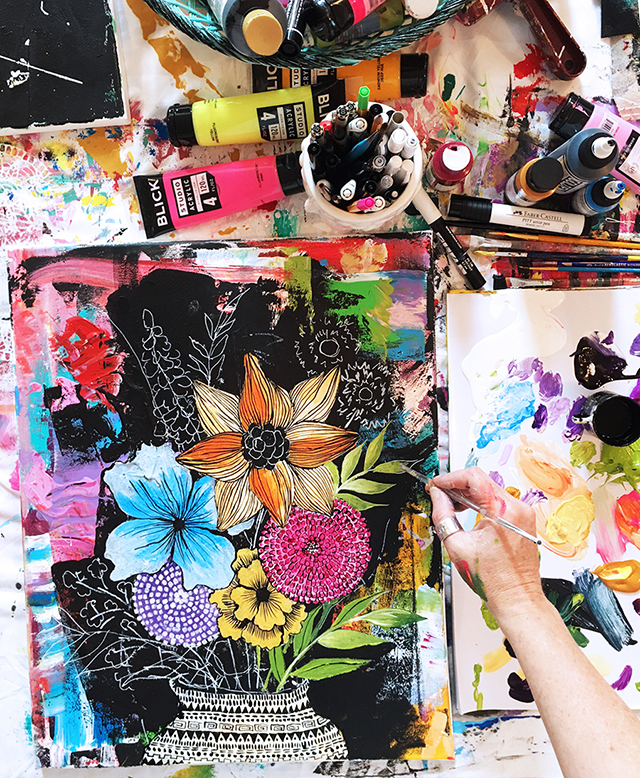
Ten years ago I walked away from my day job and I never planned or imagined the evolution and growth that my tiny creative business would have. At the time, all I wanted was to earn enough income with my creativity to be able to quit my desk job. I spent years practicing, trying, failing and searching for a creative and fulfilling career as an artist. And if I am being honest, I spent a lot of time hoping for my "big break", drifting, jumping around and never fully committing to what it would really take to achieve my dream of being a working artist. But everything changed when I decided to get serious and disciplined about my dreams. I sat down and got really honest with myself and my goals and instead of waiting for something to happen, I decided to make a five year plan to quit my day job in order to work as a full time artist.

Now, five years is a long time but I was really conservative and careful about decisions at the time. Because I was working two jobs, I knew it was unrealistic to try and quit my job quickly. Instead I gave myself a lot of time to work within my life and schedule. Today I wanted to share a detailed look at what that plan looked like. My hope is that you will find a little inspiration and feel empowered to chase after your own big goals.


Identify the BIG Dream:
My giant dream was to quit my day job and work as a full time artist. At the time my husband was working his job but we also needed my income to survive. If I quit, I needed to make the same income as my day job which was $30K per year OR $2,500 per month OR about $83 per day. While this information TOTALLY overwhelmed me at the time, breaking it down into numbers is what helped me figure out a basic plan.

TIPS: Don't be afraid to talk to the people in your life about your big goal or dream. Often it is the people that know us best that can help with support, ideas, inspiration or act as a sounding board! 

Also, don't be afraid or overwhelmed by putting a price on that dream. For a good part of my life, while I was always making and selling art, I never sat down and made a budget or put a number on my goals. The day, I looked at my bills, my financial responsibilities and the income that I needed in order to quit my job, was the day that my entire plan caught fire!


Identify the things you can do to make it happen:
My goal was to work as a full time artist and create a sustainable creative business that would produce the income that I needed to survive. I knew that this goal would likely have a lot of trial and error and involve a lot of searching for the "right way" to earn that income.When I began brainstorming and planning, I discovered that I was really flexible. All I cared about was having a job or business where I was creative. Once I was grounded in this realization, I was able to make a plan that included all kinds of different options I could try. I was able to make a plan that included all kinds of different steps. Here are the big ones that I started with:
Grow and build my online shop to make more predictable revenue. 
Apply to craft/art shows during the holidays.Write a book. 
Look for paid opportunities to write articles for magazines. 
Apply to teach at art retreats. 
Look for local (paid) teaching opportunities. 
Teach my own classes and retreats. 
Teach classes online.

TIPS: Keep an open mind about the steps it takes to reach your goal! While it is great to figure them out, you can also infuse flexibility into that plan. And when (or if) things in life change, give yourself permission to change those steps and smaller goals.

I've found that writing it all down or keeping a journal really helps in the planning process. I think that we all tend to plan differently. I am not here to tell you how to go about documenting your plan. Instead I just want to encourage you to get it on paper and use it for reference. Often it's these brainstorms, outlines or written plans that can be the daily reminder that you need to stay focused on your plan.


Get realistic about the time frame it takes to reach that goal:
When I started planning, 30k per year felt like a lot of money that I needed to make as an artist in order to quit my day job! I was overwhelmed so it made sense to give myself lots of time to try different things, save money and develop my creative business into something that would be long term. This is why I settled on a five year plan for my big dream. I knew that more time meant more flexibility for trial and error and it meant having the ability to take risks. Here is what it looked like:

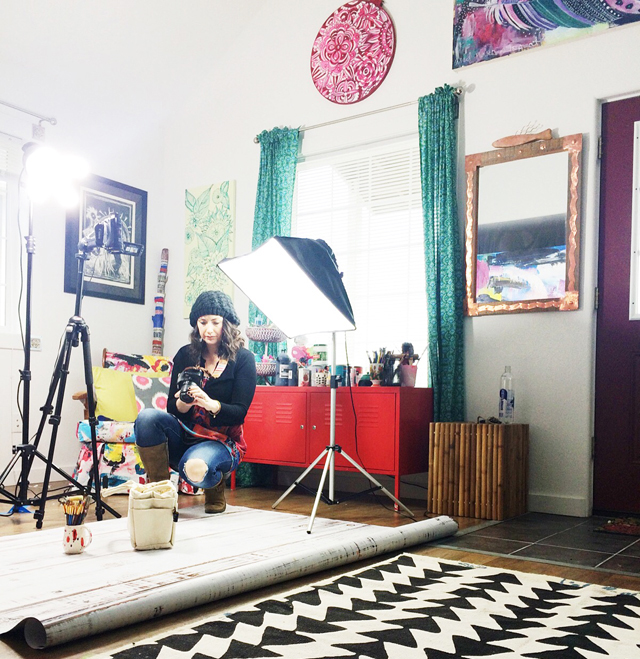
For my five year plan, I used year one and two as the time frame where I was experimenting, testing ideas, trying new things, creating new work, doing lots of research and "casting my net far and wide".

I used year three and four for growing and building upon the things that were working and were generating income. These are the years within my five year plan that I had the most growth because I had put in the hard work of really testing what would work for my dream.

Year five was the time when I began the process of walking away from my day job. By this time, I had exceeded my goal of generating $30k per year from my creative business. In fact, by this time I had run into the "good problem" of needing more time to put into my business which made quitting my day job a decision that made sense.


TIPS: Figuring out a time frame for your goal/dream is one of the most important things you can do when developing a plan. Having a clear understanding of the time it could take to reach a goal is going to help you get more realistic about what the steps involved in your plan.

Keep in mind that different dreams are all going to have a timeline that looks different. A five year plan for my dream made sense for my life but someone else may have only needed one year! Go easy on yourself when it comes to time. I've found that staying realistic and honest about my schedule, the amount of time I have and how much I do, has helped me become a better planner.


Thursday, August 24, 2017

how to start selling your artwork


I get asked all kinds of questions about all sorts of creative things and once in a while I take the time to answer the frequently asked questions here on my blog!

Something I get asked a lot is how to get started selling your artwork and today I am the best advice I can give


1. BUILD A BODY OF WORK
Before you even start to think about selling your art or craft, you MUST have a good body of work! Now, this is going to look different depending on the things you create but it really helps to begin with enough art or products that look and feel like a cohesive collection that best represents you and your style.
TIPS:
Take time to develop your style before your jump into selling your art.
Be patient with this process! Taking time to really identify your style will save you the trouble of needing to change things further on down the road. 
Challenge yourself to create a collection of art or handmade items. I like to think of a collection as enough products to fill an online shop or a good amount of paintings that can be added to a portfolio. 

2. TAKE GREAT PHOTOS OF YOUR WORK
Taking great photos of your work is one of the most important ways to capture the things that make your art unique. Over time and experience, I have learned that good lighting will make all the different in a photo. My #1 rule is to always have good lighting. This means I try to use as much natural light as possible and I never use flash.
TIPS: 
Try finding a window or place that has natural light and use this spot to photograph you work. Keep in mind natural light changes over time and can be affected by weather. I like to shoot photos in front of a window with the light source at my back. 
If using natural light is not an option, then you might want to invest in some soft box lights. Having lighting will enable you to take well lit photos at any time of the day. I use these lights in my studio. 
When taking photos of products use backgrounds that are simple. I like using white butcher paper in natural light because products appear bright and crisp in photos.
3. LOOK FOR OPPORTUNITIES IN YOUR COMMUNITY TO SELL YOUR ART

Trying to sell your work in a gallery, small boutique, craft bazaar or art festival is a great way to experiment with showing and selling your art and craft. This process can be intimidating and even scary but it can also be a valuable way to interact with the public, get instant feedback on your work and gain experience selling. While this topic could be a post in itself I want to at least share a handful of ways to get started.


CRAFT SHOWS and ART FESTIVALS:

TIPS:  
Creating stock well in advance is really important. Most customers shopping at a art festival or craft show are looking for lots of inventory to shop from. Creating a lot of products and offering variety will attract customers. 
Prepare and plan out your booth ahead of time! Different shows have different booth requirements so make sure you are aware of the required size and if there are any rules or regulations for what you can bring or set up. Laying out your booth and setting it up ahead of time (not when you show up the day of the show) will help for a smooth set up process when you arrive. 
Get creative with your booth display! Color, unique signage, interesting and ways to display our work will only help to attract shoppers into your booth.  
Have a variety of products at different price points. 
Know how to price your work. A simple formula to follow- TIME + MATERIALS= COST 
Make sure you have tags for your products, business cards, unique or fun packaging- all these things make a customer shopping at a craft show feel a little more special.  
Have a mailing list sign up available for customers to sign. 

GALLERIES:
I am going to start by saying that getting your work into galleries or even getting a solo show is can be hard and it typically isn't something that happens right away. Often you need to grow a body of work, build your portfolio, network with galleries and start small. In my experience, having worked in galleries and museums, I've found that this world is a little (dare I say) pretentious (just my opinion) and it can be a tough world to break into. But once you get your foot in the door, more opportunities can open up. Thankfully the art world is changing and these days it seems like there are more than just galleries that hang, show and sell art. Restaurants and coffee shops, even office buildings and unique stores show and sell fine art.
TIPS:  
When it comes to showing your art it often means starting small. Don't limit yourself to only looking for BIG opportunities at popular galleries- sometimes the little opportunities can lead to bigger things. 
Put together a comprehensive portfolio- digital and hard copy. This way you can email or send your work to potential contacts and opportunities. 
Always keep your portfolio updated and fresh. Add new work as you create it and try to challenge yourself to create art that could be appealing for a gallery or an art show. 
Do your research! These days galleries have websites where you can access their information and many of then even have a place to submit your work. 
Don't be afraid or discouraged by small opportunities to show or hang you work. Each of these smaller opportunities can be used to build your creative resume.
Think outside the box! Maybe you don't have galleries in your community but do you have other places and spaces that need art for their walls? Try getting creative and BRAVE and approach local businesses that might be a good fit for your work. 

RETAIL OPPORTUNITIES:
Getting your art or handmade goods into shops and boutiques is as simple as walking in and asking to speak to the manager. This method takes a lot of courage (and often a manager might not be there) so email is another great way to reach out to retail opportunities. 
TIPS: 
Made sure you understand pricing. When selling your work, retail buyers often take a percentage of your sales so you MUST be strategic when you set your prices.  
Depending on what you make, you may find that it's not profitable to sell certain products. But with a little planning you can tweak, adjust and even come up with new products so that it works for you.
Knowing your customers and where your work fits will help you find the right retail opportunities.  
Have a price list with great photos of your products all ready to go- this can be sent via email if you have inquiries about your work. 
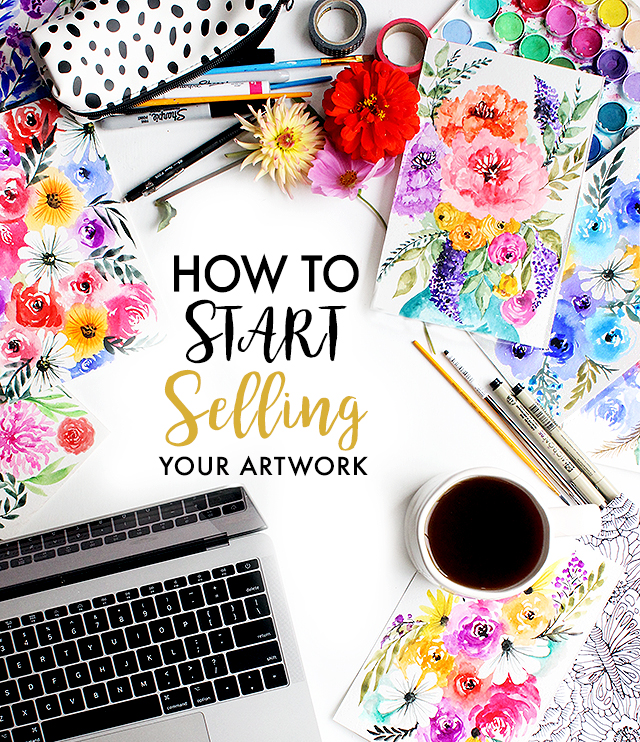
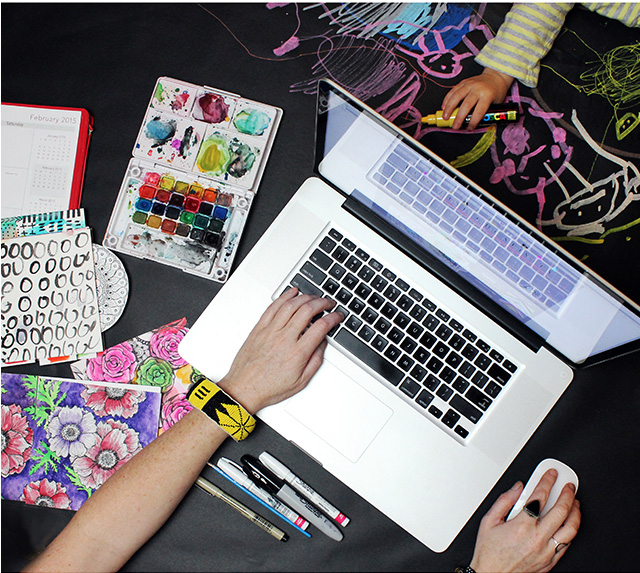
4. CREATE AN ONLINE SHOP 
One the the quickest easiest way to sell your handmade goods (or even services) is by opening an online shop. The internet is such a great resources for connecting with customers all over the world. These days creating an online shop is super fast and easy.

TIPS: 
NAME YOUR SHOP: Some artists use their names while others will come up with a shop name. If you are naming you shop, try to choose that name carefully because it will stick with you and your business for a LONG time.
BRANDING:  Branding your shop- in other words create a look and feel that represents you- will only help you to stand out amongst all those other handmade shops. A logo, an eye catching banner, photography, the brand of your shop should look cohesive and feel like you! 
GOOD PHOTOS:  Customers browsing and shopping online typically have a short attention span and that it why good quality photos are so important when putting your work online. Photos that are good, clean and clear of visual clutter will help your shop look professional. 
BE PATIENT: Don't expect sales to happen over night! As hard as it is to accept, opening an online shop requires a lot of patience, trial and error and experimenting with marketing. 
PRICING: Take time to price your goods. Your first priority should be making a profit and as tempting as it is to keep your prices low (really low) in the long term (after time spent making, marketing, shop fees, packing and shipping), it will be worth it price things higher or at least high enough so you make a profit. 

5. UTILIZE SOCIAL MEDIA
Social media is one the easiest ways to market and spread the word about the products or services that you offer. It is also a great way to connect with other people out there. While there are all kind of ways to get creative with social networking here are the things that seem to work the best:

FACEBOOK: Facebook is a great tool for building readership, marketing your work and even building a community centered around your business and the things you share. To begin, make sure you have a facebook page. Take it it a step further and promote the things you share on your page. Anything from links to your blog posts to inspiring images, quotes, your products are all things you can share on facebook. Try not to over promote- instead try to create a place where your friends can check in and see what you have going on. I've got to be honest, I am not a big fan of facebook but for me it has helped get the word out to fans, readers and customers. Facebook has become one of many marketing tools that I lean on when I need to spread the word!
TWITTER: LIke Facebook, Twitter is another tool to spread the word. Posting links to your blog content, your online shop or your website is pretty much a no brainer but using Twitter is a great way to connect with your readers in a more personal way. Posting things that inspire you, little tid bits about your day, your creative process, your life helps your readers feel more connection to you and your everyday life. Take it a step further and follow bloggers and personalities in your industry. Tweet and retweet those people and the content that they share. This is a great way to make connections and build your community.

INSTAGRAM: Instagram is one of my favorite social networking tools. Because I love to take photos and I'd rather share something visual than come up with something to say. Connecting with customers through Instagram is a marketing tool that I utilize more than anything else.
TIPS: 
While it is great to have innovative and creative content to share often what you need more than anything is to get a good flow of regular posts, updates, links and information to share. I recommend posting at least once a day but posting more is even better. 
Engaging with your customers and audience, while time consuming, is a really easy way to connect, relate, help and interact with the people that support you! Comment back and forth, answer questions, comment on things other people share. This is a great way to understand your customers, understand what they want, connect and create a network with like minded creatives. 
Don't oversell yourself! You are welcome to disagree but there has to be more to your message and the things you share than just trying to sell, sell, sell. Try finding ways to let your customers in to your process, your personal life and your voice.

Have a question you want me to answer? Feel free to leave a comment or email me alisaburke@gmail.com


To read more about my journey as an artist-

jump start a creative career- HERE

taking a leap into full time artist- HERE

coping with creative burnout- HERE

coping with failure- HERE

how to keep your work authentic- HERE

the art of chasing a dream- HERE

managing life and a creative business- HERE

the art of setting goals- HERE 

the art of blogging- HERE and HERE

the things I haven't shared- HERE

stronger than I ever knew- HERE

Monday, June 20, 2016

frequently asked questions- how do you make time create?


I get all kinds of email and asked TONS of questions about all sorts of creative things and once in a while I will take the time to answer many of the frequently asked questions here on my blog!

Something I get asked A LOT is advice about finding and making time to create. I've got a lot of experience under my belt, under all kinds of circumstances when it comes to creating and today I am sharing some of the best tips I can give for making time in your schedule for creativity.


make time to create from Alisa Burke on Vimeo.


love what you do from Alisa Burke on Vimeo.


find small chunks of time from Alisa Burke on Vimeo.


keep those supplies on hand from Alisa Burke on Vimeo.


take an honest look at your time from Alisa Burke on Vimeo.


incorporate your art into your life from Alisa Burke on Vimeo.


Have a question you want me to answer? Feel free to leave a comment or email me alisaburke@gmail.com


To read more about my journey as an artist-

jump start a creative career- HERE

taking a leap into full time artist- HERE

coping with creative burnout- HERE

coping with failure- HERE

how to keep your work authentic- HERE

the art of chasing a dream- HERE

managing life and a creative business- HERE

the art of setting goals- HERE 

the art of blogging- HERE and HERE

the things I haven't shared- HERE

stronger than I ever knew- HERE


Wednesday, April 13, 2016

frequently asked questions: how to keep your work authentic


I get all kinds of email and asked TONS of questions about all sorts of creative things and once in a while I will take the time to answer many of the frequently asked questions here on my blog!

Something I get asked a lot is how I am able to keep my work authentic, grow my style and resist the temptation to copy. Today I am sharing some of the best advice I can give for staying authentic in your work.


ABOUT MY JOURNEY:
I have always known I wanted to be an artist. I am not sure the exact age but art and creativity have been in my blood since the beginning. I have two parents who are potters and ran their business from home. This meant creativity and self employment was a big part of my life. Thankfully my parents fostered my interest in art at an early age. Growing up I took drawing classes, participated in art shows, contests and sold my art at craft fairs.

It wasn't until I graduated from high school that the concept of being an artist became real for me. While I had always identified myself as an artist, I fell in love with art in college. From that point on I knew I would do whatever it took to pursue a creative career. Like most, I worked lots of day jobs while working on my portfolio, showing my art and taking on freelance jobs. I landed a really great job in marketing that allowed me to be creative but it never satisfied my craving to make art on my terms. I finally got serious about my dreams and set out to quit my job- a long 5 year process that started with making a plan and setting a lot of goals. After time spent working long days at an office job, lots of rejection, tears, persistence and never giving up, I built a successful creative business. I was able to get to the point (financially and creatively) to quit my day job and take the leap into full time artist and entrepreneur and have never looked back


a little background from Alisa Burke on Vimeo.


get off the computer from Alisa Burke on Vimeo.


be an observer from Alisa Burke on Vimeo.


be productive from Alisa Burke on Vimeo.


put your blinders on from Alisa Burke on Vimeo.


put your own twist on trends from Alisa Burke on Vimeo.


don't be tempted to copy from Alisa Burke on Vimeo.


Monday, February 29, 2016

frequently asked questions- how do you cope with failure?

I get all kinds of email and asked TONS of questions about all sorts of creative things and once in a while I will take the time to answer many of the frequently asked questions here on my blog!

Something I get asked A LOT is how I cope with failure, rejection and dead ends. While I am not an expert (in anything), I do have experience under my belt when it comes to the challenges that come with these things. I've experienced more rejection, failure and dead ends then I have success and today I thought I would share some of my insight, experiences and the best advice I can give when it comes to coping with failure.

A LITTLE BACKGROUND:
I have always known I wanted to be an artist. I am not sure the exact age but art and creativity have been in my blood since the beginning. I have two parents who are potters and ran their business from home. This meant creativity and self employment was a big part of my life. Thankfully my parents fostered my interest in art at an early age. Growing up I took drawing classes, participated in art shows, contests and sold my art at craft fairs.

It wasn't until I graduated from high school that the concept of being an artist became real for me. While I had always identified myself as an artist, I fell in love with art in college. From that point on I knew I would do whatever it took to pursue a creative career. Like most, I worked lots of day jobs while working on my portfolio, showing my art and taking on freelance jobs. I landed a really great job in marketing that allowed me to be creative but it never satisfied my craving to make art on my terms. I finally got serious about my dreams and set out to quit my job- a long 5 year process that started with making a plan and setting a lot of goals. After time spent working long days at an office job, lots of rejection, tears, persistence and never giving up, I built a successful creative business. I was able to get to the point (financially and creatively) to quit my day job and take the leap into full time artist and entrepreneur and have never looked back


failure from Alisa Burke on Vimeo.


its not failure from Alisa Burke on Vimeo.


its ok to be uncomfortable from Alisa Burke on Vimeo.


it doesnt matter what people thing from Alisa Burke on Vimeo.


be realistic from Alisa Burke on Vimeo.


be resilient from Alisa Burke on Vimeo.


To read more about my journey as an artist-

jump start a creative career- HERE

taking a leap into full time artist- HERE

coping with creative burnout- HERE

the art of chasing a dream- HERE

the art of setting goals- HERE 


the art of blogging- HERE and HERE

the things I haven't shared- HERE


stronger than I ever knew- HERE


Thursday, June 25, 2015

coping with creative burnout


Creativity and making art is a really interesting process- as much as you would like to control and schedule when inspiration and productivity hits, most of the time you are the mercy of the process. After a lifetime of creating, learning, developing my style and growing a business, I've learned A LOT about the cycle of creativity. And today I am talking all about coping with creative burnout!

burnout from Alisa Burke on Vimeo.


I used to freak out when I would hit a wall or struggle with burnout and after years of fighting it, I finally learned that the best thing I can do is embrace it!


When I hit a wall, the last thing I typically feel like doing is exercising. But I've found that when I drag myself outside, move my body and breath fresh air, I ALWAYS feel rejuvenated and energized!
EXERCISE from Alisa Burke on Vimeo.


I've found that when I am coping with creative burnout, it helps to focus on something totally unrelated to painting, drawing and running my business. Instead I look for things outside of my reality that are creative and interesting. My favorite is anything that has to do with cooking- for some reason watching a cooking documentary or making a meal in the kitchen instantly helps me relax while being creative in a different way.


A lot of the time I take myself and my creativity WAY too seriously so when I hit a wall, the first thing I need to do is lighten up and have a little fun!

have fun from Alisa Burke on Vimeo.


There is an ebb and flow to the cycle of creativity and sometimes the most important thing you can do is trust the process. Creativity, ideas and energy can come and go but if you have passion and the space in your life for creativity, you will bounce back from burnout. It may take a little while but I promise it will come back.

Monday, September 16, 2013

creating with a kid

I get all kinds of email and asked TONS of questions about all sorts of creative things - and once in a while I like to answer many of the frequently asked questions here on my blog!

If you follow me on Instagram or frequent my blog you will know that we spend A LOT of time making art as a family and I get asked lots of questions about what we use, the process, and how we keep things clean. So here are a few answers to all those questions! (please note that I am not a childhood development expert or a kids' art teacher- I am simply a mom who is an artist!)


Teaching art is truly my passion and I've spent a lot of years sharing with students how to let go, get messy and lose yourself in the process. While I have loved every single moment of teaching, nothing compares to the absolute joy I get from fostering creativity in my daughter, Lucy. At 23 months this kid has witnessed both my husband and I making art every day. And while it makes no difference to us if Lucy grows up to be an artist, we do want her to be a creative thinker. We feel that including her in our daily art-making process is one the best ways we can teach her to do this! 

Some days its drawing, some days its painting, some days its crafting, while other days I bring her to my studio and let her hang out while I paint. Other days she hangs out with Andy while he draws- our goal is to have a chunk of time each day dedicated to the creative process.


You are welcome to disagree with me but I believe in letting Lucy work with most of the supplies (within reason) that I work with. I am not going to give you a "must have supply list" for creating with a toddler. Instead I would like to ask you this: what do you love creating with? What are your favorite supplies? What kinds of process and techniques  bring you joy? My belief is that the things you love to work with will likely appeal to your child. For me, the best part of creating with Lucy is having the opportunity to share what I am most passionate about: mark making, surface design, color, crafting, expressive painting, printmaking and drawing. 

She has been watching me draw and paint since she was born and always seems to be most interested in the supplies that I use. I know this will change as she gets older but at this stage, sharing my favorite supplies with her (instead of shopping for kids' stuff) works best for our process.


 With all of that said, here are the supplies that we use:


Call me crazy but I let Lucy work with acrylic paint. We use craft paint in a variety of colors and typically I will have 4-5 of those colors available when we work.


Typically we save acrylic painting for my studio, but if we need to paint at home I will cover the floor with a drop cloth. I don't cover her in a smock or apron but instead she works like I do (we have clothing to wear that is already covered in paint). I don't spend lots of money on expensive clothes so paint on her pants will never bother me!


I let her use brushes, household items (like sponges, chopsticks, forks and string) and her hands to apply paint. Typically she paints for about 30 minutes max and then enjoys sorting and stacking the paint bottles for the rest of our time.

TIP- If you don't want to commit to acrylic paint but want a similar material to work with, try using tempera paint, Crayola washable paint or finger paint. You can use the same types of painting techniques without the risk!


We also use watercolor paint a lot. This is a much less messy (and non-permanent) painting option to use around the house and there are still all kinds of fun and creative techniques to experiment with.

We have a big basket full of different watercolor sets and water brushes (again, all supplies that I use) within reach so Lucy is able to grab them whenever the mood strikes. I always have a large pad of all purpose paper around so that she has plenty of surface space for painting. 


Drawing and expressive mark making is a BIG part of our creative process and we always have a variety of washable pens, pencils and crayons on hand and accessible.


Typically the process looks like this-

We spread out a few large pieces of paper (sometimes we use paper that we have already painted on) and all of our pens and crayons.
I let Lucy get take the lead and start scribbling. 
We work together, typically moving from one piece of paper to another.
This process lasts 10-30 minutes and typically ends with her drawing on her feet or my arms and legs!


We will draw and paint on just about anything (sketchbook pages, computer paper, newsprint, canvas, wood and fabric) but my favorite supply for Lucy is large pads of all purpose paper. They are big enough to be able to stretch out and work large but can also be cut up into smaller pieces if needed. 


Working as an artist means that at any given time I have a variety of supplies and projects that I am working on. This means I do my best to include Lucy as much as possible. Here are a few more of our favorite things to work with:

 printmaking: we are loving Gelli printing right now
yarn and embroidery floss project
crayon resists and watercolor painting
acrylic paint on fabric
stamping: rubber stamps, hand carved stamps and potato stamps
collage on canvas.


Just as its important for us big people to have a space for creating, I think the same is true for kids! In our home, we have a little corner in each room stocked with supplies and then we also have an area in our living room with an easel set up. Our plan was to make the space with the easel Lucy's little creative corner, but just like us she seems to be happier roaming around from room to room creating. One day it is drawing on the floor in my office, the next it may be sitting at the kitchen table painting. Regardless of where she creates, I like to make her feel that she has the permission and the space to create when she is inspired.


Making art, any kind of art, with a toddler is really messy and typically my studio space and our home look like a bomb went off after a good creative session. This doesn't bother me at all- probably because I am messy and my process as a painter is all about letting go and getting swept up in the moment, and this includes being ok with making a mess. With that said, I know not everyone out there feels the way I do about messy creating but if you can loosen up a little and let go of perfection, letting your child explore and go wild with materials can be a really dynamic experience!

TIPS- 

Set aside one or two creative sessions every week dedicated to embracing a messy process (painting, printmaking, stamping, using alternative materials, etc).

Designate a space that is ok for mess making. We use the kitchen floor or a corner in my studio. Use a drop cloth or old sheet to cover things up.

Let go of control, rules, and cleanliness and give your child some space and encouragement to experiment (within reason) with the materials. 

Include your child in the clean up process. Washing brushes, wiping down a counter or putting supplies away is an important part of the creative process!


It is most important for me to let Lucy find her own voice when it comes to creating. This means that instead of showing her how to do things, I try my best to let her experiment and follow her lead whenever we are creating together. 

If we are collaborating on the same surface, I always follow her lead- If she uses her hands, I use my hands, if she scratches into the paint with a fork, so do I. I make a point NOT to show her how to draw something specific or mix color the right way or correct her process. As an artist I know first hand how profound and exciting experimentation can be, especially when painting so I try to put my creative needs aside and let her take the lead. 

If I need to paint and work on my own projects I will set up a small area for her to work along side me OR I will give her a portion of my canvas where she can go wild and do anything she wants on the surface. This strategy works well when I need to get work done but still want to have some creative time together.

Becoming a mom has been one of the most inspiring and profound things to happen to me and my art. I cannot say enough how wonderful it is to be able to sit down and create with my daughter! I want to challenge all you parents, grandparents and family to find a way to do something creative with your kiddos, let go of rules and simply get lost in the moment together.


To follow my entire journey as a mom and read more about our creative collaborations you can visit the Life With Lucy link in the right hand column.


LinkWithin

Related Posts with Thumbnails