
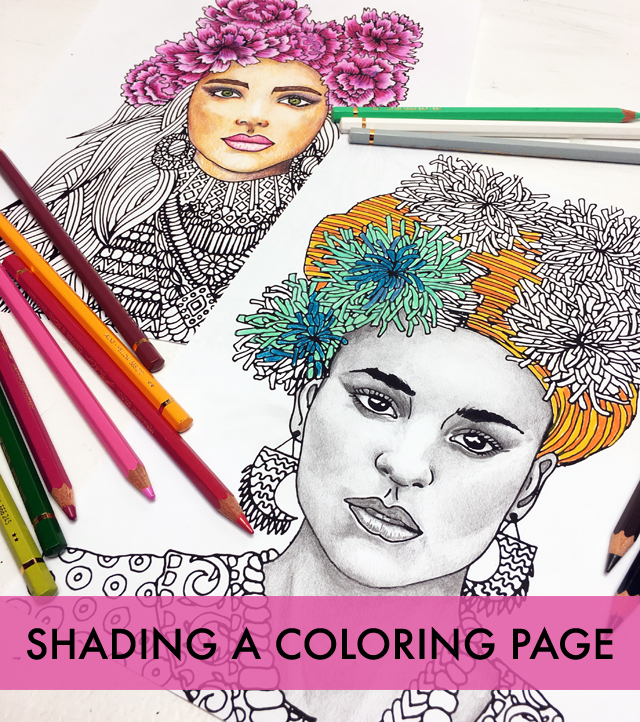
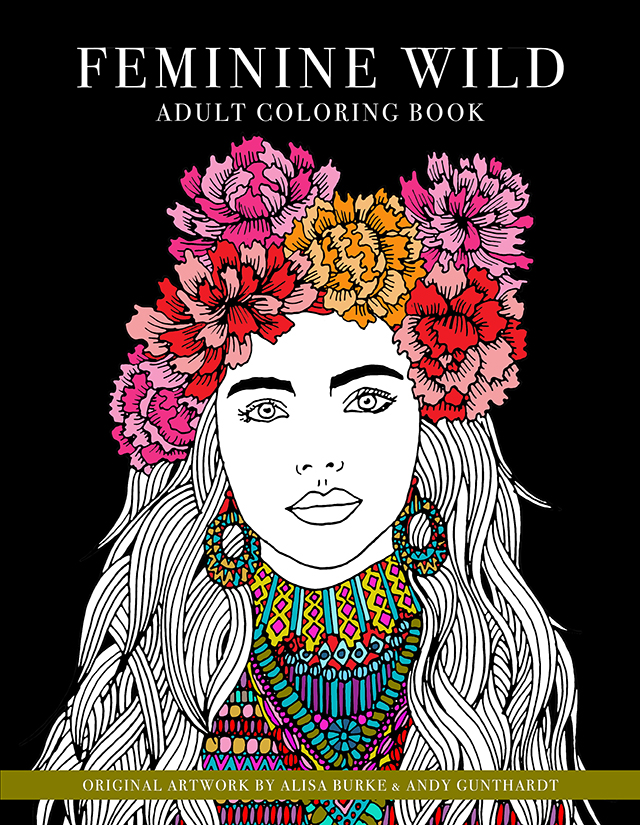
Last week I launched my new coloring book- Feminine Wild. This is a 25 page self published coloring book that I collaborated on with my crazy talented husband Andy. About 6 months ago, we had the idea to create a coloring book that made use of our individual talents! Andy is a master at drawing portraits and I love drawing pattern so we began working on a coloring book completely dedicated to women- all kinds of bold and beautiful women.
This coloring book lends itself to coloring pattern but we also wanted to do something a little different and create pages that give you the opportunity to play with shading faces. Today I asked Andy to share some simple tips and trick for shading faces with pencils.
There is no rule that says you always have to use color on a coloring page. In fact, using a lead pencil is a really great way to practice shading.
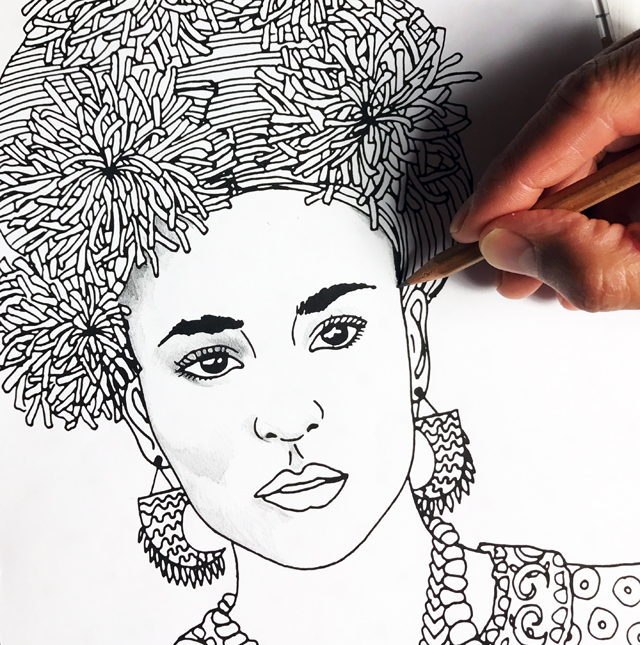
Shading a face is all about bringing depth and dimension to a flat line drawing. I like to begin by adding light areas of shading to the places on the face that typically have contour or shadows- the top of the forehead, cheek bones, above and under the eyes and under the nose.
This process starts very light which means I put very little pressure on my pencil as I shade.
To gradient shade, I move my pencil back and forth on the paper going from dark to light by applying pressure for the dark areas and light pressure for the lighter areas. My goal is to create a shade that flows smoothly together from dark to light.
After I have those light areas, I begin to go back over them with gradient shading. Gradient shading is probably one of the most common ways to shade an object. It is the easiest way to transform a 2-D object into something that has dimension and life.
TIP: If you are using a pencil for gradient shading, different grades of pencils will create different results. For example pencils with a "B" gradient are softer (B-9B) and will create a bold, dark lines. Pencils with "H" gradients are harder (H-9H) and will create light, softer lines.
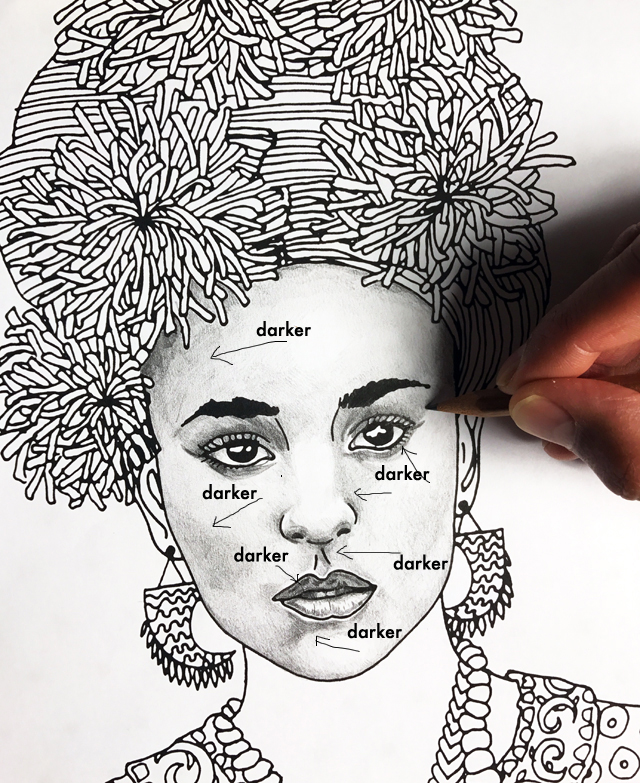
I continue to layer the shading and get even darker around the forehead, the eyes, cheek bones, under the nose and chin. An easy guide to use for darker shading is to go darker next to the lines on.
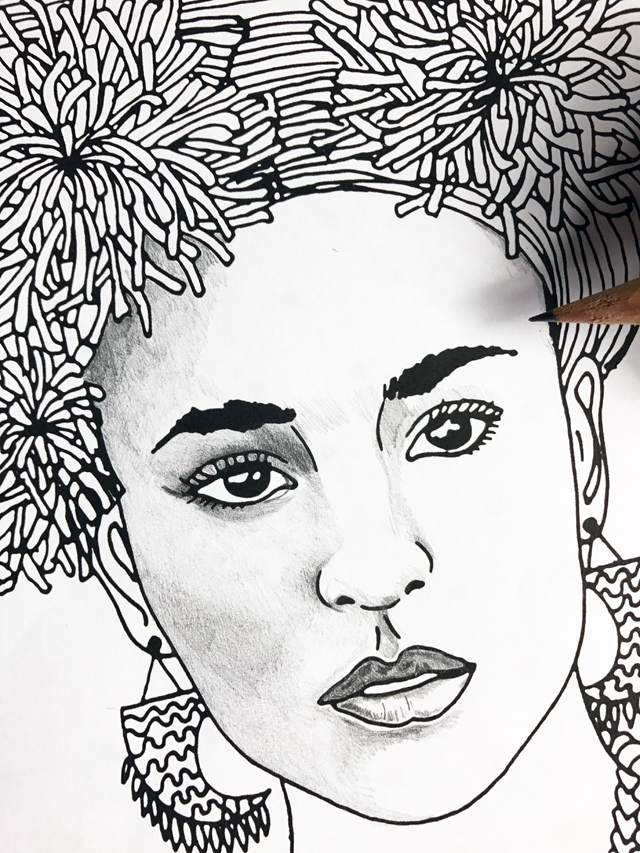
TIP: Leaving a sliver of white under or around the lips and eyes give the illusion of dimension.
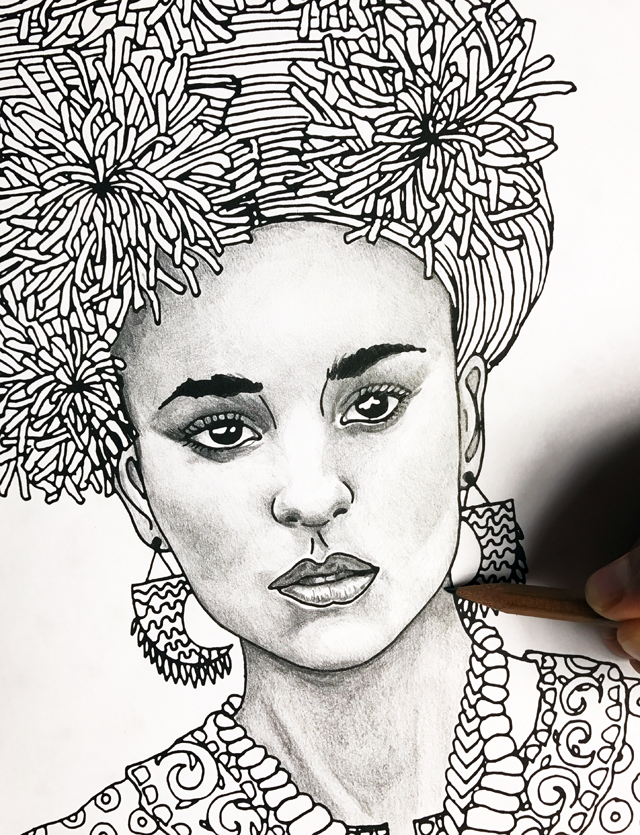
I continue to layers my shading to my shading until light and dark begin to blend together.
TIPS: Holding your pencil at different angles will result in different results (lighter vs. darker, smooth vs. texture, etc).
Keep the tones of your shading the same by applying the same pressure on your drawing tool.
If you are using a pencil to gradient shade, try blending or smudging the lead on paper with your finger or a blending tool (blending stump).
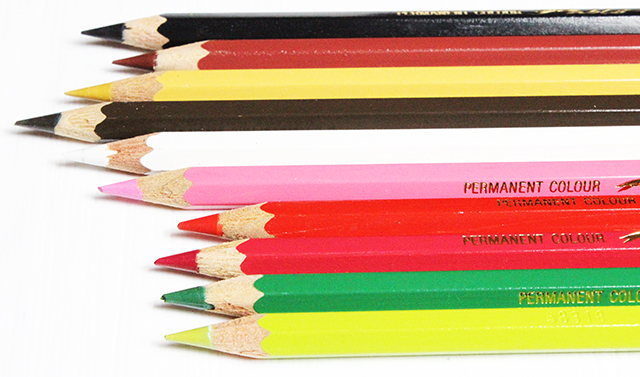
Using colored pencils to shade a face is the same concept as using a lead pencil except you have the ability to layer color. I like to start by selecting my color palette.
TIP: When selecting colors, make sure to grab different shades of a color- this will enable you to achieve the illusion of depth and dimension.
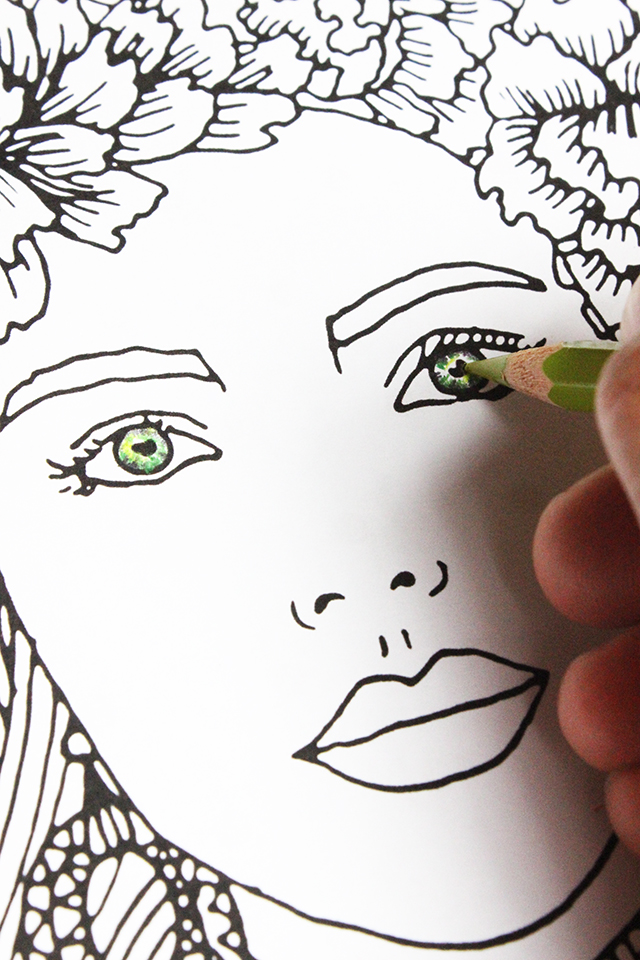
Next, I begin with the eyes. I start by selecting the darker shade of color (in this case green) and then go back over it with a lighter shade of green and then back over it again with white. This give the illusion of depth.
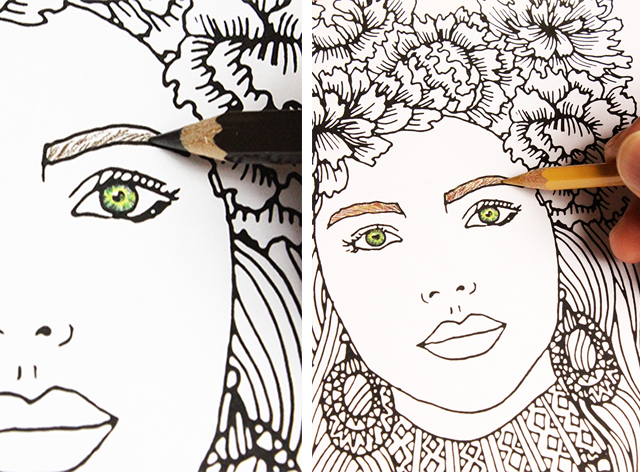
Then I move on to eyes brows- again I start with the darker color and then add lighter color over the top.
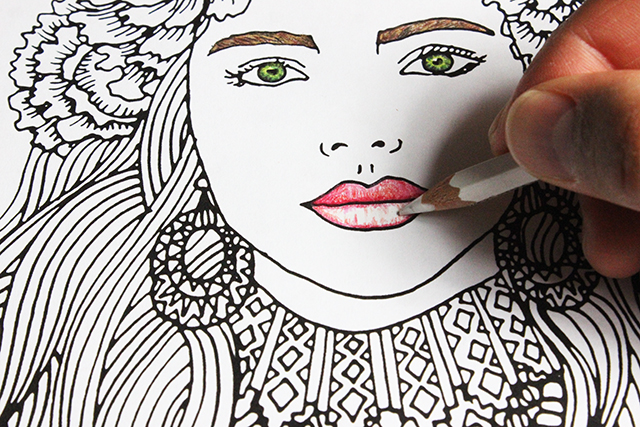
For the lips I start with a dark color and then add white highlights over the top.
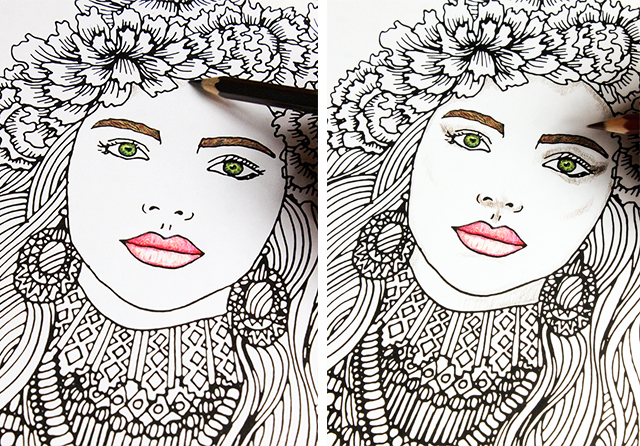
When it comes to shading the face, I use the same technique that I used with my lead pencil. I start with the darkest color (in this case dark brown) and lightly shade the areas that have more contour or shadow.
Next I begin to gradient shade with a lighter color over the the entire face- using more pressure around the areas where I want it darker.
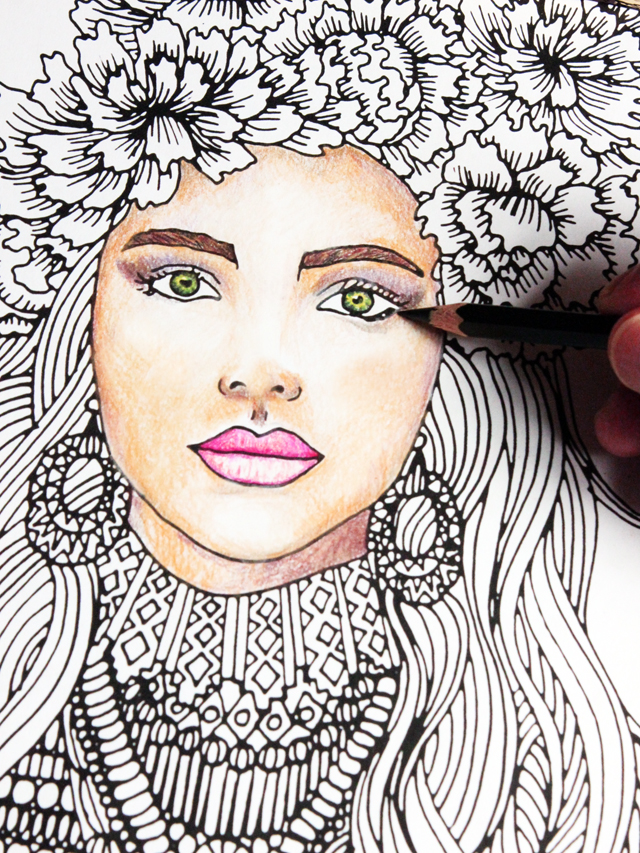
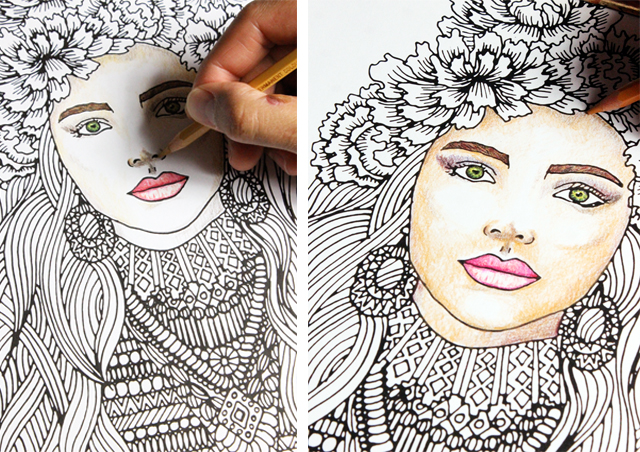
 I switch back and forth between my different shades, adding areas of darker color over the top of light areas and lighter color over the top of darker areas.
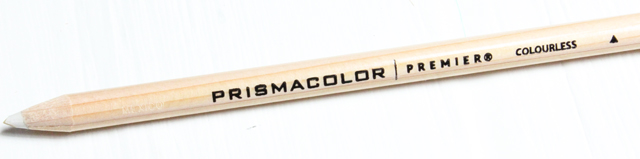
Last, I like to use a blending pencil to go over the top of everything. The blending pencil enables you to soften hard edges and blend different shades of color together.


9 comments:
Geniale l'idea di poter colorare anche con una semplice matita!
Brilliant the idea of being able to coloring even with a simple pencil!
Gorgeous, Alisa!!Really beautiful collaboration!
Thank you for the detailed explanation. You both do beautiful work.
This is such a beautiful and helpful post! This artisticity:you guys are so inspiring!
Much love and thank you for sharing these concrete tips and tricks ...
As always, I am in awe ...
Loved this post! Thank you!
Cool tutorial! Thanks!!
This is a great post, thank you for the tips.
Very Helpful Tips, Thank you! What a talented couple!
This is so great, thank you Andy and Alisa. I'm finding coloring books really helpful in my own art and a really expressive thing to do. It actually encourages you to be creative yourself, kind of the opposite to what I initially thought. You can really learn so much from doing it that translates over into your own art and to interact with something drawn by someone else is so much fun too.
Sara
Post a Comment