Wednesday, May 18, 2016

exploring sisters, oregon

During our little getaway to Central Oregon we wanted to find an in-between point that we could use for coming and going. Since lots of time on the road with a 4 year old can be challenging, we wanted to find a nice location that could be our home base. We looked no further than Sisters, Oregon. 


Sisters is a small and charming town in the foothills of the Cascade Mountains. The name Sisters comes from the three Cascade peaks along the southwest skyline known as the Three Sisters. Fun Fact: The three peaks are nicknamed  Faith, Hope and Charity

Twenty- five minutes from Bend and two hours from the Painted Hills (the big reason we wanted to venture out to this area) made Sisters the perfect home base for our adventures.

While we really enjoy camping in our van, it was Andy's birthday so went all out and booked a room at the Five Pines Lodge. This was a big deal because it was Lucy's first time (since being a baby) staying at a hotel. I've never seen someone so excited for the hotel experience! 

I am crazy picky about hotels and I was SO happy that we picked Five Pines Lodge because is was such a beautiful and relaxing place to stay! They have 25 cabins and then a grand lodge with rooms. They have a beautiful property with lots of walking trails.

It was really nice to come back to lodge in the evenings after driving, hiking and exploring all day.


This trip we kept our meals pretty simple- we brought food for most of our meals but we also  enjoyed take out from Three Creeks Brewing Company, dinner at Rio and YUMMY doughnuts and coffee from Sisters Bakery.


Central Oregon is a playground for outdoor activities and Andy had a blast renting a mountain bike and riding the Peterson Ridge Trails

While Andy was mountain biking Lucy and I had fun strolling around downtown Sisters. A few of our favorite shops- Alpaca by Design, Ken Scotts Imagination, Stitchin' Post, Clearwater Gallery

We had a great stay in Sisters and again, it was the perfect home base for all of our outdoor adventures!

You can check out all of our family adventure HERE

Tuesday, May 17, 2016

staying inspired on the road

We are back home from our whirlwind adventures in Central Oregon and I am busy "downloading" my brain and all the inspiration, ideas and images that I soaked up from this little trip. As an artist I feel that it is so important to keep myself fresh and inspired and that is why we always make time to get out and explore.

Today I am sharing some of the best advice I can give when it comes to staying inspired and creative on the road!

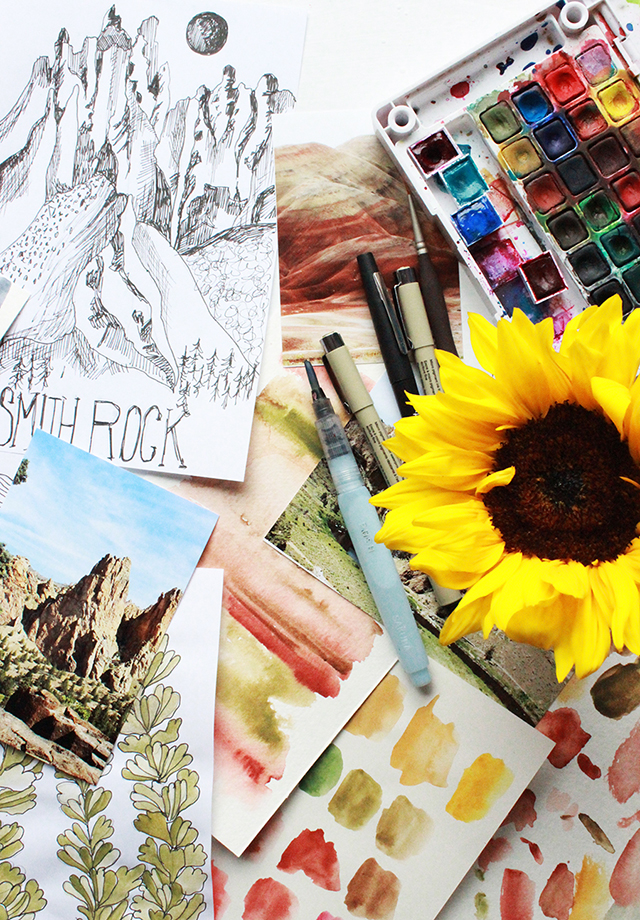
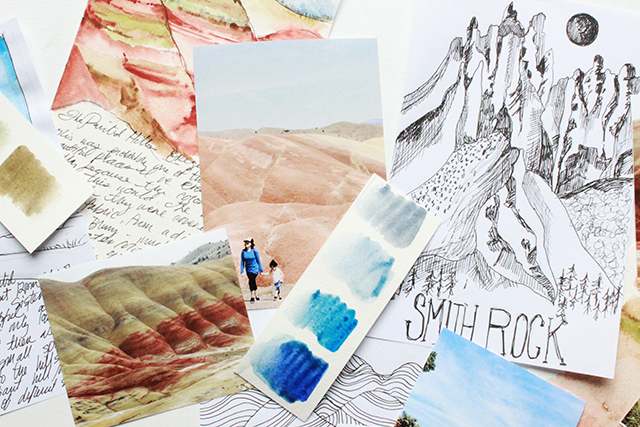
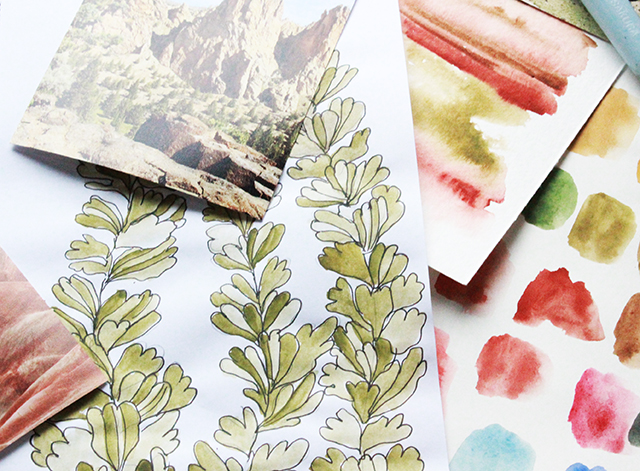
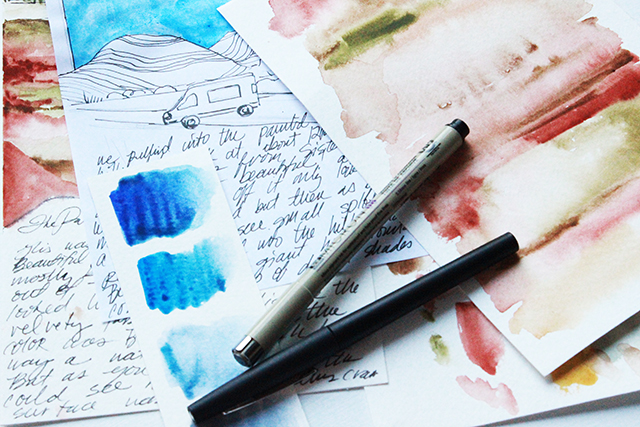
When we are on the road exploring, I spend most of my time taking photos that I can bring home and use as inspiration in my art, my classes and my blog posts. I also have paper, my drawing pens and watercolors on hand. While I don't take lots of time to make art when we are exploring, I do use small chunks of time to jot down ideas, create fast expressive sketches and try and capture colors that catch my eye. 


KEEP SUPPLIES ON HAND
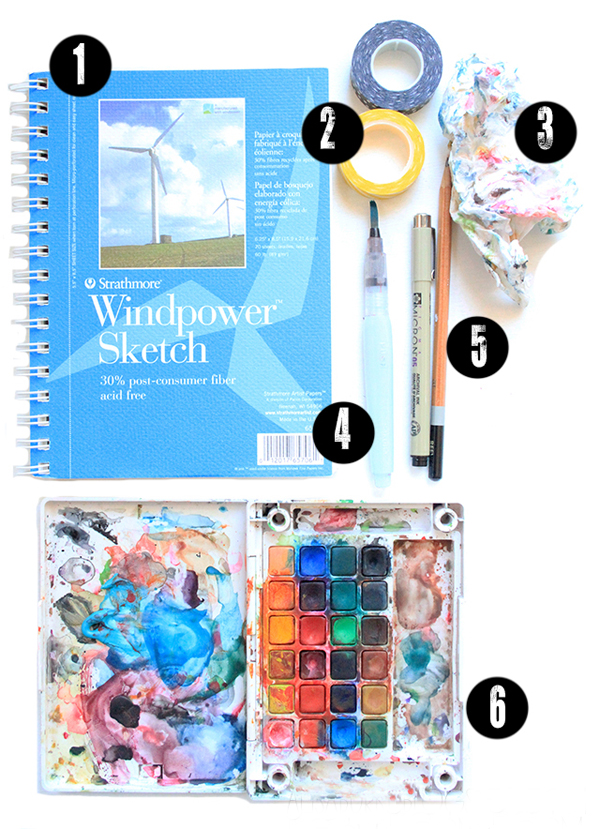
I have found that having simple supplies on hand (that can go anywhere with me) helps keep me inspired draw, sketch and doodle whenever and wherever I am.

1. A sketchbook- preferably one that is not too expensive. I keep a number of the Strathmore sketchbooks on hand- my favorite size is 6.26 x 8.5 inches- it is big enough to have a nice page to work on and small enough that I can throw it in my purse.
2. I keep some kind of tape on hand (washi tape is a favorite) because I like to adhere things (like lists and sketches that I create on scrap paper) to the pages of my sketchbook.
3. I always have some kind of paper towel or rag.
4. A water brush- I almost always have a water brush with me because it cancels out the need to bring a water vessel. You simply put your water in the handle of the brush, squeeze the handle and water comes out of the brush.
5. I always have a pencil and pen with me.
6. I prefer to add color to my pages with watercolors- they are easy to use and most important- very portable and easy to pull out when you are on the go. My favorite watercolors to use are Sakura Koi Watercolor Sketch Box

TIP: Keep your sketching supplies in your purse or in your car or by the door. If you end up somewhere inspiring or even have time to kill (doctors apt., road trips, picking up kids from school, soccer games, etc) pull out that sketchbook and get creating! Use your surroundings (no matter what they are) as your inspiration.


TAKE LOTS OF PHOTOS
I always have a camera on me- sometimes its my fancy camera, sometimes its my iphone while other times its my Instax MINI. In addition to sketching, I am always snapping photos of my subject matter. This process enables me to not feel rushed while sketching on the go. Instead I am able to use my photos as reference and keep sketching once I get home. 


LET GO OF PERFECTION
For some reason, sketching outside or on the go is more challenging for me. I still love it but I tend to be more concerned about perfection than when I am working in my studio. It probably has a lot to do with time constraints (I often feel rushed) and comfort (sitting on a large rock is not as comfortable as my couch). Over time I have learned that its ok to be challenged or a little uncomfortable and I use these moments to work on letting go of perfection in the sketching process.


KEEP A FIELD JOURNAL
When I am outside I am ALWAYS on the lookout for treasures that I can use as subject matter for sketching. Treasures for me are pretty feathers, shells, rocks, a pretty leaf, flowers and just about anything from nature! I like to bring my treasures back home and complete a page or two dedicate to things that I found. I like to think of this process a little like keeping a field journal and my sketchbook has become a place to record observations and findings from nature.


TAKE CREATIVE NOTES
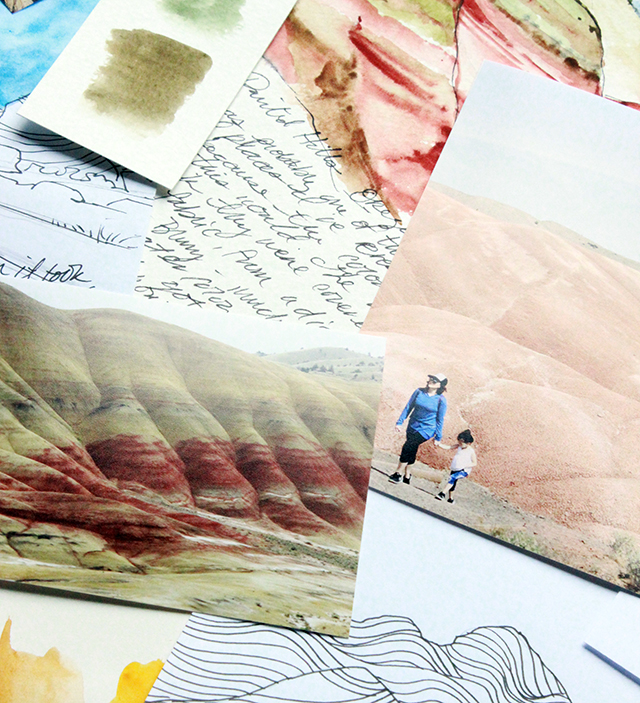
Sometimes I don't have time to sit and sketch on the go but I still want to capture an idea or inspiration in my sketchbook for later. I like to take creative notes- I jot down a quick sketch, record the weather, the colors I see, shapes, pattern or texture. When I am back home with more time, I use my visual notes as reference for drawing and painting projects.

CAPTURE THE ESSENCE
Since sketching on the go can be challenging try to challenge yourself to "capture the essence" of your inspiration instead of feeling like you need to be perfect. Try to focus on the color, pattern, shapes and texture instead of perfectly replicating your subject matter.

Monday, May 16, 2016

exploring the painted hills

It was Andy's birthday last week so we planned a fun family getaway to Central Oregon to do some exploring. We had a blast and were able to experience some amazing things and I came back very inspired. There is so much to share that I decided to break up our trip into a series of posts. So this week on the blog will be little different because I've decided to share all of our adventures! Next week we will return to regular scheduled programming. 

First up is the Painted Hills. You guys, this place is amazing, especially if you are a photographer or an artist. While I have explored a lot of Oregon, the Painted Hills were on my bucket list. If you live in the Northwest or if you are planning a trip to Oregon, I would TOTALLY recommend making time to experience this magical place.

The Painted Hills are one of three units of the John Day Fossil Beds. They are located in Eastern, Oregon about 6 miles off of HWY 26. The closest town is Mitchell, Oregon. They are basically in the middle of nowhere and require quite a bit of driving- but so worth it! We stayed in Sisters, Oregon (more about that another day) which was about 1.5 hours away. Since we travel with a four year old who always has the wiggles, we try and break up our driving into 2 hour blocks.

As you drive along the 6 mile road you slowly come upon hills that look as if they have been covered with bright paint. The farther you drive, the more color appears until you are surrounded by an amazing and colorful landscape.

Once upon a time, this area was floodplain covered in forests prehistoric animals. The colors that streak the hills were formed over 35 million years ago by volcanic eruptions and changing climate patterns. Over time, the layers of ash and different kinds of minerals and plants eroded causing the unique color. 
The black soil is lignite, the grey is mudstone, siltstone and shale. The red/rusty color is laterite soil that was formed by the floodplain deposits back when the the area was warm and humid.
And the crazy part is that the colors shift and change with different angles, light, weather and seasons. I took photos from a variety of angles, camera settings, locations and with different lighting, and every photo (out of the 600 that I took) all have shades of color and details that are different. It blew my mind!!

TIPS: If you are a photographer or if you are looking to get some great photos, challenge yourself to really experiment and play around with angles. Also try planning the time of day-early morning and early evening will always be the best times to take photos. We arrived late morning and it was really bright (not my favorite conditions for photography) but I was able really play around with taking photos in different locations and at different angles. 


Rain apparently intensifies the bands of red and orange color and during April and May yellow flowers grow in the nooks and crannies and down the side of the hills which adds even more color and contrast.

What I found crazy is that from a distance the mountains look fuzzy or soft, like they are covered in velvet. But up close you see that the entire surface has a crackled texture which gives everything this really interesting blurry effect.

The Painted Hills have all kinds of short hiking trails (perfect for a kid) that give you different views, lighting and angles of the color. 
TIP: It is illegal to walk on the hills because it will leave footprints for years so a telephoto lens or a camera with some good quality zoom will enable you to get some great up close photos.
PAINTED HILLS HIKES:

Carroll Rim Trail (1.6 mile round trip): The best panoramic views of the Painted Hills. There is a small parking area at the trailhead.

Painted Hills Overlook Trail (½ mile round trip): The trail of the Painted Hills follows a ridge just above the multicolored mounds, offering many places for photos. 

Painted Cove Trail (¼ mile loop): Since you can't climb all over the Painted Hills, this is a fun trail because you are able to get up close on a short boardwalk trail. 

Red Scar Knoll Trail (¼ mile round trip): This out-and-back trail gives you another close look at what makes the Painted Hills so colorful.

Leaf Hill Trail (¼ mile loop): The Leaf Hill area has been the site of paleontological research. No fossils can be seen today along the trail, but an interpretive exhibit shows examples of a few leaves that have been found there.

TIPS: Bring water and sunscreen. This place, even in the spring gets really hot and even a short hike in the sun will catch up with you. Also stay on the trails. This is rattlesnake country so it's always best and safest, especially if you are hiking with kids, to stay aware of your surroundings and keep to the the trails.


We had such an amazing time exploring the Painted Hills and it is by far an Oregon must see!

You can check out all of our family adventure HERE


Thursday, May 12, 2016

in the studio with consie sindet


I'm Consie Sindet and I live in Hunterdon County, NJ in the US with my husband of 17+ years, Lee, Charlotte the boxer and Max the cat. My life as an artist seems to be ever evolving and over the past year, I feel like I am reinventing myself. I’ve painted forever it seems and sold craft items for about 12 years with my mom and sister. I’ve also taught decorative painting and painted murals in both homes and businesses. I currently spend a huge amount of the summer as a face and body painter and apply henna at fairs. My newest love, which I discovered at the beginning of 2014, is the world of mixed media and art journaling. I also got my first sewing machine last year to work on paper and canvas. I am truly looking forward to where my art takes me!


I love seeing how other artists set up their creative space. Can you tell us a little bit your studio?
My studio is a small room in our rental apartment that measures approximately 7’x13’. It is a bit of a strange space in the middle of the apartment and has 3 doorways, a closet and a window, so wall space is at a premium. The ceiling is also super low at 6’ 5”. Lighting is an issue so I have had to be creative with that aspect and rely on three lamps that shine down on my main table. The 6’ table I work at is jacked up on bed risers because I find myself standing many times to work. 


I love having most of my supplies surrounding me, so the shelving unit I wedged the table into and the wire baskets have been great. You can see my “super fancy” video setup in the photo. A piece of wood clamped to the shelf with a Gorilla pod to hold my iPhone and I am all set to go! Other parts of the room hold another small table for drying projects and I managed to stash a storage cabinet under that table since I don’t need to sit at it. I also have a tall cabinet for a lot of those miscellaneous supplies you don’t need right now but just can’t seem to part with. 


That white cabinet was driving me crazy so I spent a couple days doodling all over it to add fun to the space! My sewing machine lives on a small table in another room out of the way since it is not something I use everyday. The space has been great to work in and having the studio at home has allowed me to do what I call “drive by crafting”…add a little here, paint a little there when I can!


What inspires you? What motivates you to create?
Everything! I never know what will strike a cord with me. A blog post, a pin on Pinterest, walking down the street, something my yoga teacher said…it all can create a spark to work from. I’ve been joining creative challenges on Instagram and those have allowed me to stretch in new directions and share what I am doing. I think a big motivator for me is the ability to share my work. Both my blog and Instagram have been great for that. I got lost for a while with my art and started the blog to give me a reason to be creative. It has certainly worked and I can’t imagine not wanting to create something everyday.


How do you organize your creative schedule?
I pretty much just create when I cana couple minutes before dinner or bed, on the weekends if Im not face painting at a party, in between all my part time jobs during the week. I use the time I am dog walking (one of my jobs) to think of ideas or to take pictures of the outdoors for a post. I always have some small sketchbook and supplies with me when I am babysitting. The notes app on my iPhone is filled with ideas that I can use when I have a block of time at home in the studio. It would be great to have a set schedule to be creative but that is not what my life is like right now.


What is a typical day like for you?
I don’t think I have a typical day! Everyday is a bit different. I do start off most days with a cup of coffee and my iPad to see what’s new on the blogs I follow and on Instagram (I’m completely addicted). Then it is off to work at one of my part time jobs. Some days I spend late afternoon or the time while dinner is cooking to work in the studio. I’ve even stopped at my desk on the way to bed to just add a little something to a project! Tuesdays are typically the only day open to work for long periods of time. On that day, I will work on the blog posts for that week, catch up on paperwork, even video a project or two. 

What are you working on right now?
Right now I am working through the beginning stages of a couple of online classes that I would like to offer. I am totally loving the art journaling experience and would love to share that with my readers in a beginner class. I try to doodle or work on an art journal page most days and to stay true to my word for the year...createjust do it for the sake of enjoyment! Of course, I am always balancing that with the desire to make a living with my creativity! I guess I will see where this creative journey takes me!


LinkWithin

Related Posts with Thumbnails